Private Label, White Label, Wholesale partnerships available - EU, USA and UK - Free shipping from €75
Sterile solution handling: A best-practices workflow guide
Master your sterile solution handling workflow with this evidence-based guide. Ensure clean, reproducible results every time. Learn more!
TL;DR:
- Strict aseptic techniques and proper workspace setup are essential to prevent contamination in peptide research.
- Human factors, such as skipping steps or shortcuts, are the leading cause of sterility failure.
- Regular training, workflow validation, and trusted materials are crucial for reliable sterile solution preparation.
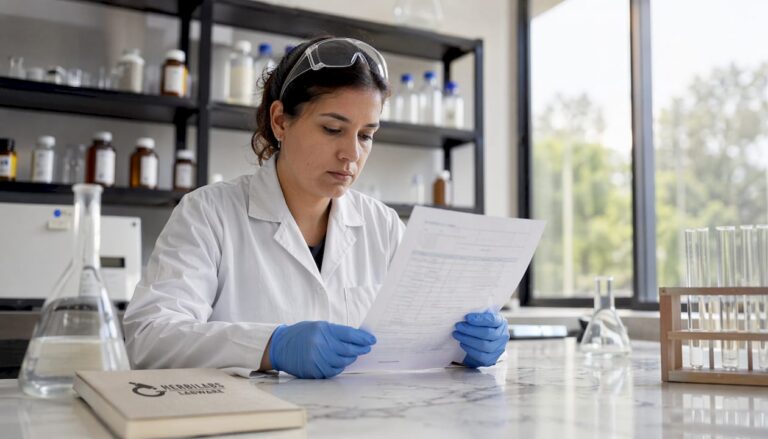
One contaminated vial can invalidate weeks of peptide research, yet the mistakes that cause it are rarely dramatic. Most failures trace back to skipped steps, rushed preparation, or subtle lapses in aseptic discipline that no piece of equipment can compensate for. Researchers working without pharmaceutical-grade infrastructure face this challenge constantly: you need to match the sterility outcomes of a clinical lab using whatever workspace you have available. This guide gives you a concrete, evidence-based workflow that covers every stage from setup to long-term storage, so your results stay clean and reproducible.
Table of Contents
- What you need for a sterile solution workflow
- Preparation steps: Establishing and maintaining sterility
- Executing the workflow: Handling, reconstitution, and vial use
- Storage, stability, and verification: Ensuring ongoing sterility
- Expert perspective: Why human factors still rule sterile workflows
- Advanced solutions and supplies for reliable sterile workflows
- Frequently asked questions
Key Takeaways
| Point | Details |
|---|---|
| Sterility starts with setup | Clean environments, proper garbing, and validated supplies prevent most failures. |
| Aseptic technique is critical | Consistent, disciplined non-touch handling sharply reduces contamination risk. |
| Empirical verification is mandatory | Routine visual checks, media fills, and stability tests are the basis of ongoing sterility. |
| Human error is biggest threat | Continuous training and workflow discipline matter more than equipment alone. |
| Reliable supplies support results | Use only certified-grade water, vials, and glassware to sustain safe, reproducible experiments. |
What you need for a sterile solution workflow
Before solution handling begins, you need the right tools and an environment set up for sterile work. This is not about having the most expensive setup. It is about knowing exactly which elements are non-negotiable and which are flexible depending on your risk level.
The gold standard for sterile compounding is an ISO 5 primary engineering control (PEC), which includes a laminar airflow workstation (LAFW) or a biological safety cabinet (BSC). USP<797> cleanroom standards require an ISO 5 PEC, an ISO 7 buffer zone, and an ISO 8 anteroom for any sterile compounded preparation. Low-risk preparations must involve no more than three sterile products and a maximum of two container entries, with BUDs (beyond-use dates) assigned based on risk tier, storage conditions, and media-fill test results. For independent researchers, a laboratory-grade LAFW is the practical minimum when working with injectable preparations.
Even if you work at a simpler bench, you still need:
- Sterile examination or powder-free nitrile gloves (sterile gloves for critical operations)
- Sterile, depyrogenated glassware or amber glass vials
- Water for injection (WFI) or bacteriostatic water depending on the vial type
- 70% isopropyl alcohol (IPA) wipes for surface decontamination
- Sterile syringes, needles, and transfer devices
- A calibrated analytical balance and sterile weigh boats
A key principle that applies at every level: sterile fields must be established close to procedure time, never left unattended, with a 1-inch border around the perimeter that is considered non-sterile. Supplies should be opened by peeling away from yourself, and you must never reach over the open sterile field. Violating this rule, even briefly, is enough to compromise the entire setup.
| Environment type | ISO class | Typical use case | Key limitation |
|---|---|---|---|
| LAFW/BSC | ISO 5 | Sterile compounding, injectables | Requires dedicated room |
| Cleanroom bench | ISO 7 | Low-risk transfers | Limited for injectables |
| Basic aseptic bench | No formal class | Research grade (non-injectable) | High contamination risk |
| Isolator system | ISO 5 (sealed) | High-risk or automated work | High capital cost |
Garbing sequence matters more than most researchers expect. Always don shoe covers first, then hair cover, then mask, then gown, and finally sterile gloves. Each item added after gloves risks shedding particles onto already-gloved hands. Reviewing sterile lab techniques before your first session will help you internalize these sequences without having to think through them under pressure.
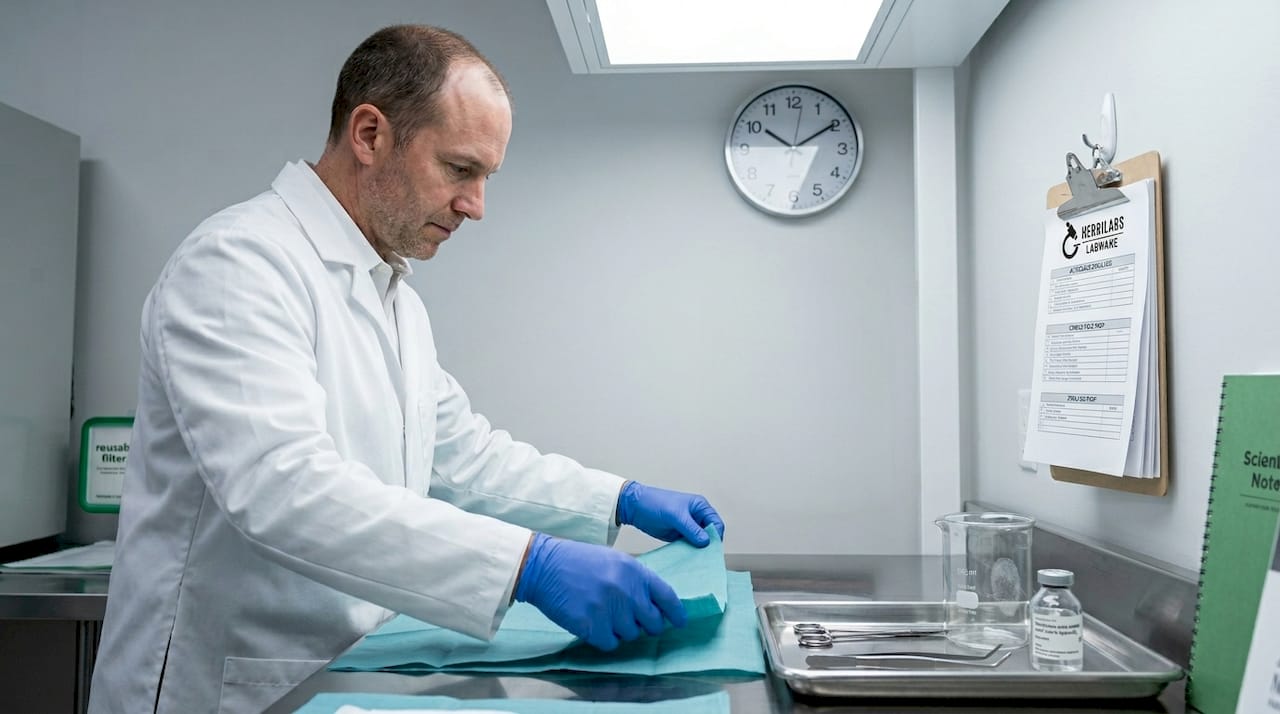
Preparation steps: Establishing and maintaining sterility
Once your equipment and workspace are set, the focus shifts to carefully preparing the sterile field and personnel. This stage is where most independent researchers cut corners, and where contamination almost always originates.
Aseptic technique rests on a clearly defined hierarchy. Hand hygiene comes first, followed by maintaining first-air access to all critical sites within the ISO 5 zone. First-air refers to uninterrupted airflow directly from the HEPA filter, before it can contact any surface or person. Any object placed upstream of your vial or syringe in that airflow path introduces contamination risk.
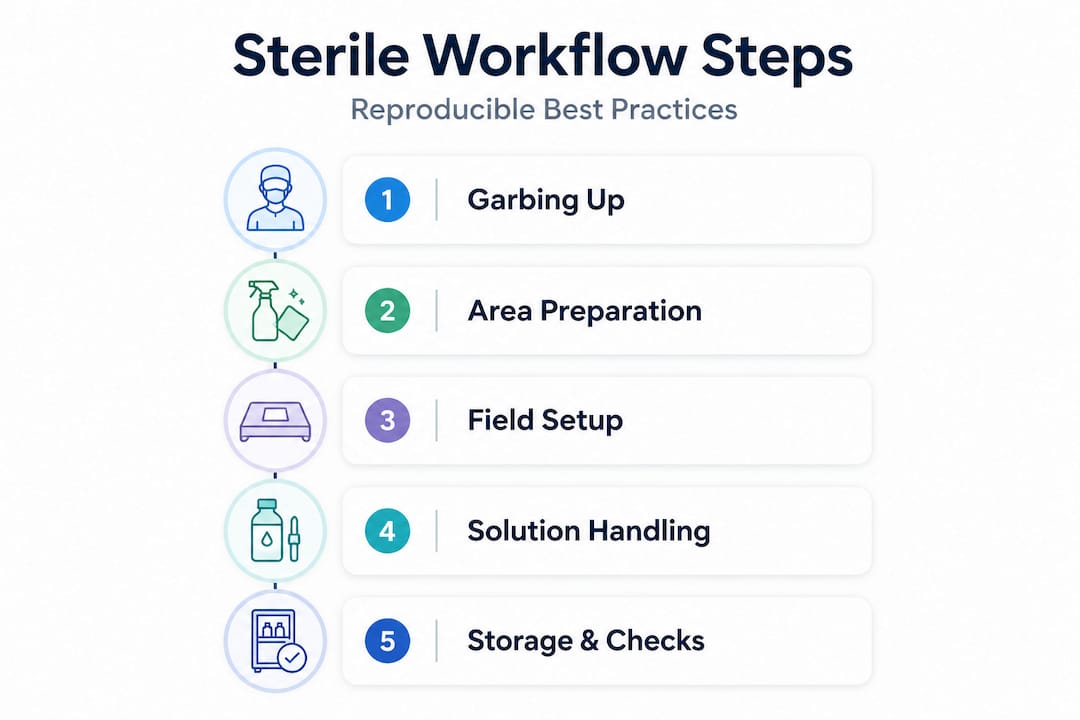
Follow this stepwise preparation sequence every single time:
- Wipe down all surfaces with 70% IPA, working top-to-bottom and front-to-back.
- Perform hand hygiene with a validated antimicrobial wash for at least 30 seconds, dry thoroughly.
- Don garb in the correct sequence described above.
- Arrange all supplies at the edge of the sterile field in the order you will use them.
- Confirm every critical surface (vial septum, syringe tip, needle hub) is protected from air contact until the moment of use.
- Minimize motion inside the ISO 5 zone: slow, deliberate movements protect the laminar airflow pattern.
“Personnel are the primary contamination source in any aseptic process. Skin shedding alone, at a rate of tens of thousands of particles per minute, means that even brief ungloved contact or rapid gesturing over an open field is a genuine contamination event.”
Human factors dominate contamination in virtually every reported sterility failure. Skin shedding, technique errors, and behavioral shortcuts are far more common causes than equipment malfunction. This is why continuous training and media-fill testing are considered essential in pharmaceutical manufacturing, and they should be taken seriously in independent research settings too.
Pro Tip: If you make a small mistake during field setup, such as touching a gloved hand to a non-sterile surface, do not try to mentally assess whether it “counts.” Replace the glove and restart the affected portion of the field. The time cost is trivial compared to the cost of a failed run.
For deeper background on safe research solutions and how to build a reliable preparation protocol, additional guidance can help anchor these principles before you proceed to the actual handling steps.
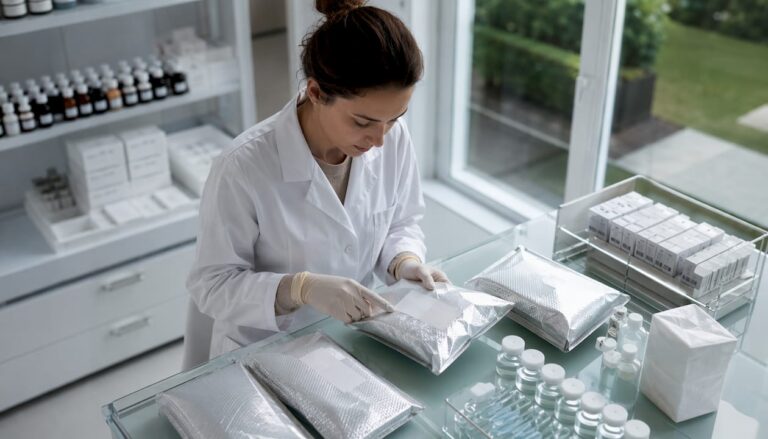
Executing the workflow: Handling, reconstitution, and vial use
With the sterile field established, you are ready to actually handle solutions and reconstitute peptides following best practice.
The execution phase breaks down into five sequential operations: opening supplies, diluting the solute, transferring to final container, sealing, and labeling. Each step requires specific aseptic actions, not improvisation.
- Open sterile syringes, needles, and vials by peeling packaging away from the field.
- Wipe each vial septum with a fresh 70% IPA wipe and allow it to dry for 30 seconds before puncturing. Never fan it dry; fanning disturbs airflow.
- Draw reconstitution solution (WFI or BAC water) using a sterile syringe, inject slowly down the inside wall of the peptide vial rather than directly onto the lyophilized cake.
- Gently swirl (never vortex) the vial until the solute is fully dissolved. Vigorous agitation can denature sensitive peptides.
- Transfer the reconstituted solution to a final storage vial if required, apply a sterile closure, and crimp or cap immediately.
- Label with date, concentration, solvent used, and beyond-use date before removing the vial from the sterile field.
The choice between bacteriostatic water and unpreserved sterile water is critical here. Multi-dose vials require BAC water with benzyl alcohol as a preservative to inhibit bacterial growth between uses. Unpreserved sterile water is strictly single-use and should never be used to reconstitute a peptide you plan to access more than once. For a thorough comparison, the discussion of bacteriostatic vs sterile water clarifies when each diluent applies.
| Vial type | Appropriate diluent | Max entries | Discard after |
|---|---|---|---|
| Single-dose vial | Sterile water (WFI) | 1 | Immediately |
| Multi-dose vial | BAC water (0.9% benzyl alcohol) | Per labeling | 28 days |
| Amber glass storage vial | BAC water or sterile diluent | Based on risk | Per BUD |
European Pharmacopoeia and USP standards align on water quality and glassware requirements, but independent labs should validate volumetric stability empirically rather than relying on published shelf-life data alone, since many commercial peptides fall outside the standard pharmacopoeia solute categories. For an expanded look at how BAC water compares to other diluents, that resource covers the practical tradeoffs in detail.
Pro Tip: Amber glass vials are not just for aesthetics. Light exposure accelerates degradation in many peptides. Store filled amber vials cap-side down in a labeled rack so the closure integrity is easy to verify at a glance, and minimize the time vials spend uncapped by pre-arranging caps and closures before you begin any transfer.
Storage, stability, and verification: Ensuring ongoing sterility
Once solutions are reconstituted and sealed, ongoing vigilance ensures sterility does not fail before use.
Storage is where many researchers treat sterile handling as finished. It is not. A perfectly prepared solution can still be compromised by temperature excursions, poor container selection, or inadequate labeling. The pharmacopoeia standard for volumetric solutions calls for initial standardization followed by verification at days 1, 3, 7, 15, and 30. A solution should be discarded if it drifts outside 0.2% RSD or shows a concentration change greater than plus or minus 10%. Shelf-life is capped at 30 days under these conditions, stored in dry amber glass at room temperature or per the solute’s specific requirements.
For ongoing sterility monitoring, check each solution against this list before every use:
- Clarity: Solution should be visually clear, not hazy, turbid, or discolored.
- Particulates: Any visible floating matter is grounds for immediate discard.
- Precipitation: Cloudiness or settled solids indicate degradation or contamination.
- Fungal growth: Any color change, fuzzy matter, or unusual odor means the vial is compromised.
- Seal integrity: The closure should be fully seated with no signs of coring or loosening.
- Label legibility: Date and concentration must be visible without ambiguity.
For quantitative benchmarks: media-fill testing must show a failure rate no greater than 0.1% per FDA guidance. ISO 5 environments have an airborne microbial alert limit of 1 CFU per cubic meter. WFI must meet an endotoxin limit of less than 0.25 EU per mL. Isolator systems can reduce contamination by 100 to 1000 times compared to restricted-access barrier systems (RABS), which explains their growing adoption even in mid-scale research settings.
Pro Tip: Build a simple paper log next to your storage area. Write the vial ID, preparation date, expected BUD, and a checkmark for each visual inspection. This takes 20 seconds per session and creates the audit trail that will explain any anomalous result in retrospect. More detailed bacteriostatic water shelf life guidance can help you set realistic discard timelines for specific diluents, and the lab storage guide covers temperature-controlled storage options relevant to the European research environment.
Expert perspective: Why human factors still rule sterile workflows
The hardest part of sterile solution handling is not learning the protocols. It is executing them accurately and without shortcuts, every single time, regardless of workload pressure or familiarity with the process.
In our experience supporting researchers across the UK and Europe, the most common contamination failure mode is not a broken LAFW or a bad batch of diluent. It is a trained researcher who has become too comfortable. They skip the 30-second IPA wipe dry time. They reach over the sterile field instead of repositioning. They fail to replace a glove after incidental contact because “it probably did not touch anything important.”
Human factors dominate contamination in pharmaceutical manufacturing and in independent research equally. What changes between the two settings is the feedback mechanism. A pharmaceutical facility runs media fills regularly and catches drift before it becomes a pattern. An independent researcher running two or three reconstitutions a week may go months before a contamination event surfaces as a failed experiment, by which point it is nearly impossible to identify exactly when the discipline lapsed.
The practical fix is not more complex equipment. It is deliberate practice. Run a media-fill simulation once per quarter using a nutrient broth in place of your diluent, then incubate the result for 14 days. If you see growth, you have a real technique problem. If you do not, you have meaningful evidence that your workflow is sound. Pair that with a refresher on sterile lab technique every few months, particularly after any workflow change.
Automation and isolator systems are worth considering when your throughput increases or when you move to higher-risk preparations. The contamination reduction they offer is substantial, but they do not replace discipline: they reduce the opportunity for human error, not the incentive. Build the habit first.
Advanced solutions and supplies for reliable sterile workflows
Consistently sterile results depend on two things: a well-practiced workflow and research-grade materials you can trust. Even the best technique is compromised by inconsistent diluent quality or containers that introduce contaminants at the source.

Herbilabs supplies bacteriostatic water, sterile reconstitution solutions, and research-grade labware manufactured to strict purity standards, with quality control processes designed for exactly the workflows described in this guide. Whether you are just starting out or looking to standardize an existing process, the bacteriostatic water FAQs cover the most common questions researchers ask before committing to a diluent. If you are ready to order, the sterile reconstitution solution is a reliable starting point for multi-dose peptide work. For a broader preparation guide, the safe solution preparation guide pairs directly with the workflow steps above.
Frequently asked questions
How soon before use should a sterile field be set up?
A sterile field must be established immediately before use and should never be left unattended, as unmonitored fields are considered contaminated regardless of elapsed time.
How long can a properly stored volumetric solution remain stable?
Shelf-life can reach 30 days when the solution is stable within 0.2% RSD, shows no visual contamination signs, and is stored under appropriate conditions in sealed amber glass.
What is the biggest contamination risk during sterile handling?
Personnel are the primary contamination source in any aseptic process, with skin shedding and technique errors responsible for the majority of sterility failures in both clinical and research settings.
Why use bacteriostatic water instead of sterile water for MDVs?
BAC water contains benzyl alcohol as a bacteriostatic preservative, which inhibits microbial growth between vial entries, making it the only appropriate choice for any multi-dose vial reconstitution.
What daily checks help ensure solution sterility?
Before each use, check for clarity, absence of visible particulates or precipitation, and any signs of fungal growth. Discard immediately if any of these visual indicators are present, regardless of the labeled BUD.
Recommended
- Laboratory water handling guide: ensure purity in research
- How to Use Bacteriostatic Water in Lab Protocols? Valuable skills in 2025 – Herbilabs Labware
- Bacteriostatic vs Sterile Water: Safe Lab Application Guide 2025 – Herbilabs Labware
- Essential Sterile Lab Techniques for Safe Peptide Research
- Top Sanitation Practices in Freeze-Dried Dog Food Plants