Private Label, White Label, Wholesale partnerships available - EU, USA and UK - Free shipping from €75
Sterile solution preparation: Steps, safety, and best practices
Master sterile solution preparation with our comprehensive guide. Ensure safety and consistency for every peptide preparation with expert tips!
TL;DR:
- Proper aseptic technique and environment checks are essential to prevent silent contamination during peptide reconstitution.
- Using injection-grade sterile solvents and validated equipment ensures solution sterility and research reliability.
- Time pressure and handling errors are common causes of contamination in home or small-lab peptide preparations.
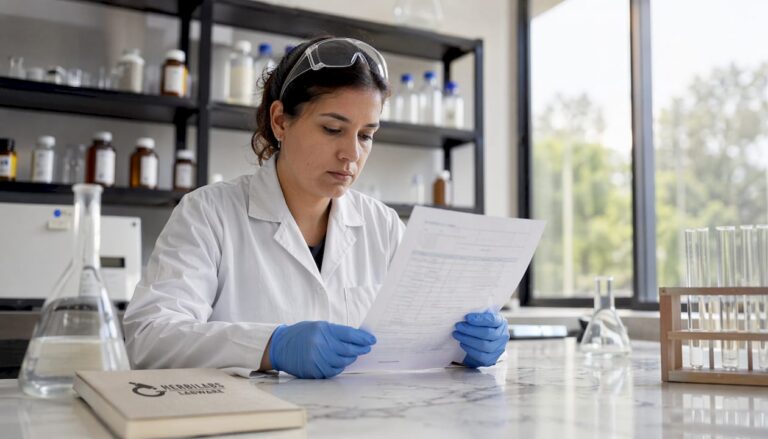
Contamination during peptide reconstitution does not announce itself. A single breach of aseptic technique, a stopper wiped with the wrong material, a solvent drawn from an unsealed vial, or a gloved finger brushing a needle tip, can silently destroy the integrity of an entire preparation. For independent researchers and peptide users working across Europe, whether in dedicated facilities or adapted home environments, reliable sterile solution preparation is the foundation of every meaningful result. This guide delivers a practical, regulation-aware walkthrough that bridges European manufacturing standards with real-world constraints so your preparations stay clean, consistent, and safe from the first step to the last.
Table of Contents
- What you need: Tools, materials, and environment checks
- Step-by-step sterile solution preparation procedure
- Troubleshooting, validation, and cleaning: What to watch for
- How EU guidance shapes sterile preparation for independent researchers
- What standard guides won’t tell you about real-world sterile solution prep
- Get reliable sterile solutions and guidance for your lab
- Frequently asked questions
Key Takeaways
| Point | Details |
|---|---|
| Sterility starts with preparation | Having the right tools, environment, and checklist dramatically reduces contamination risk before you even begin. |
| Technique is everything | Careful aseptic handling, from handwashing to vial access, protects both your research and your safety. |
| Validated cleaning is essential | Visual inspection isn’t enough—true sterility depends on proven cleaning and verification methods. |
| Know regulatory expectations | European guidelines like EU GMP Annex 1 should inform your practices—even outside formal labs. |
| DIY isn’t a substitute for compliance | Home protocols help, but only proper standards guarantee safe, reliable sterile solutions long-term. |
What you need: Tools, materials, and environment checks
Before any solution touches a vial, you need to take stock of everything required and verify that your environment meets the minimum standard for aseptic work. Skipping this step is one of the most common sources of contamination among both experienced and first-time researchers.
Required supplies checklist
You will need, at minimum:
- Sterile, single-use syringes and needles (appropriate gauge for your peptide and solvent viscosity)
- Sterile vials or ampoules (pre-sealed, depyrogenated glass preferred)
- Bacteriostatic water or sterile water for injection (never tap, distilled, or drinking water)
- 70% isopropyl alcohol (IPA) swabs for stopper disinfection
- Powder-free nitrile gloves (non-sterile gloves introduce particulates; sterile gloves are preferable in critical zones)
- Labeling materials (date, contents, concentration, expiry)
- Waste sharps container
- Clean paper or lint-free laboratory wipes
These are not optional extras. Each item on that list exists to prevent a specific failure mode.
Environment and workspace
The EU GMP Annex 1 standards revised in 2022 establish that sterile manufacturing expectations are centered on a Contamination Control Strategy (CCS), risk-based controls, and qualified aseptic processing. That regulatory baseline matters even when you are not a licensed manufacturer. It tells you what risks are real and why certain controls exist.
In practice, “sterile” and “clean” are not the same thing. A surface can look spotless and still harbor viable microbial contamination at levels that would compromise your preparation. Sterility requires validated processes, controlled air, and disciplined technique, not just the absence of visible dirt.

The ideal setup includes laminar flow (unidirectional, HEPA-filtered air that sweeps particles away from your work surface). Without one, your best alternative is a dedicated, uncarpeted workspace, cleaned with IPA, away from vents, pets, and foot traffic. Familiarize yourself with sterile lab techniques before approaching any live preparation, and review sterilization tips to calibrate your cleaning procedures properly.
Materials, equipment, and sterility overview
| Item | Sterility requirement | Single-use or reusable | Validation needed |
|---|---|---|---|
| Syringes and needles | Must be sterile | Single-use only | None (pre-validated) |
| Vials (peptide/solvent) | Must be sterile | Single-use preferred | None (pre-validated) |
| Gloves (nitrile) | Powder-free minimum | Single-use | None |
| IPA swabs | 70% sterile-grade | Single-use | None |
| Glassware (beakers etc.) | Depyrogenated required | Reusable with validation | Cleaning validation |
| Work surface | Disinfected before use | N/A | Visual + IPA wipe |
Pro Tip: Even at home, you can create a practical “clean zone” by placing a fresh, IPA-wiped, lint-free mat inside a large plastic storage bin. Work inside the bin. This limits the critical zone to a small, controllable area and dramatically reduces particle exposure.
Step-by-step sterile solution preparation procedure
With your environment checked and supplies confirmed, follow these steps in sequence. Skipping or reordering steps is where contamination most commonly enters.
- Wash hands thoroughly with soap and water for at least 20 seconds. Dry with a clean, lint-free paper towel. Then put on powder-free nitrile gloves.
- Disinfect your clean zone with a 70% IPA wipe. Allow it to air-dry completely before placing any supplies down.
- Inspect all supplies for packaging integrity, expiry dates, and visible damage. Discard anything that shows signs of compromise.
- Lay out supplies without touching sterile surfaces. Do not touch needle tips, syringe plunger tips, or vial stoppers with bare or gloved hands.
- Disinfect the vial stopper with a fresh 70% IPA swab. Use one swipe motion and allow 30 seconds of contact time before proceeding.
- Draw the solvent using a fresh sterile syringe. For bacteriostatic water or sterile water reconstitution, confirm the label specifies “for injection” use.
- Inject the solvent slowly down the inside wall of the peptide vial. This is called the “wall trick.” Directing liquid against the side of the glass rather than onto the powder prevents foaming, protein denaturation, and aerosol generation. It is one of the most impactful technique points in peptide reconstitution.
- Allow the vial to dissolve by gently rolling it between your palms. Never shake a peptide vial. Shaking generates bubbles, mechanical stress, and foam. All of these can compromise peptide integrity and create inhalation risks.
- Visually inspect the final solution for cloudiness, particles, or unexpected color change before labeling.
- Label immediately with the preparation date, contents, concentration, and expiry. Store according to your peptide’s requirements.
Why technique around vial access matters most
Aseptic preparation guidance consistently stresses that sterile supplies, minimizing exposure and handling, and controlled airflow form the governing framework for contamination prevention. But the data also points to one specific failure cluster. According to peptide reconstitution best practice, a repeated high-impact failure mode is technique around vial access, including stopper disinfection, solvent addition mechanics, avoiding foaming or aerosolizing, and minimizing time and exposure.
In plain terms: how you handle the vial and how you add the solvent matters more than almost anything else in a home or small-lab setting.
Critical safety principle: Only use solvents labeled for injection. Tap water, distilled water, and drinking water are never sterile and cannot be made sterile by boiling at home. The risk is not just contamination. It is also endotoxin (pyrogen) load, which carries its own serious consequences entirely separate from microbial contamination.
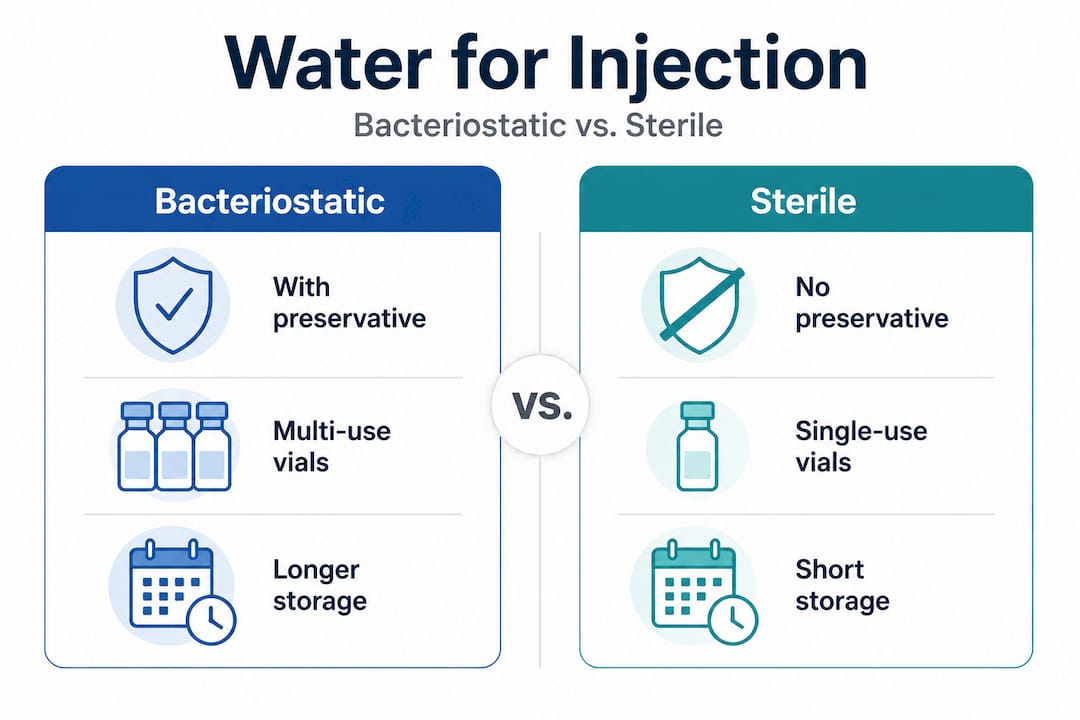
Bacteriostatic water vs. sterile water: Choosing the right solvent
| Property | Bacteriostatic water | Sterile water for injection |
|---|---|---|
| Preservative | 0.9% benzyl alcohol | None |
| Multi-draw use | Yes | No (single use only) |
| Best use case | Multi-dose peptide vials | Single-dose or sensitive compounds |
| Shelf life after opening | Up to 28 days (if handled correctly) | Use immediately |
| Risk on repeated access | Low (preserved) | High (unpreserved) |
Pro Tip: If you are unsure which solvent to use for a specific peptide, default to bacteriostatic water for multi-dose scenarios and review the specifics on contamination control practices before drawing multiple doses from any single vial.
Troubleshooting, validation, and cleaning: What to watch for
Completing the preparation is not the end of the process. Verification is part of every competent sterile protocol and is often the step skipped by independent researchers under time pressure.
Common mistakes that introduce contamination
- Touching any sterile surface, including needle tips, syringe barrels, or vial stoppers, even with gloves on
- Using the wrong solvent (distilled water, tap water, or non-injection-grade solvent)
- Over-handling the preparation, every additional action increases the contamination window
- Not allowing IPA to dry fully before accessing a stopper (wet IPA can carry particulates into the vial)
- Re-using single-use needles or syringes between draws
- Working near active air currents, open windows, or HVAC vents
Spotting signs of a failed preparation
Visible indicators are not always present, but when they are, act on them immediately:
- Cloudiness or haziness in what should be a clear solution
- Floating particles or sediment that does not dissolve on gentle rolling
- Unexpected color change compared to the expected appearance of your peptide
- Unusual odor upon vial access
Critical principle: Visible clean does NOT guarantee sterile. A solution can appear perfectly clear and still contain microbial contamination at levels that would fail a sterility test. Do not use visual appearance alone as your validation method.
Validation for reusable equipment
If you use reusable glassware, validation is not optional. Glassware cleaning validation for pharmaceutical compliance incorporates principles such as Total Organic Carbon (TOC) testing and conductivity measurement to confirm that cleaning has been effective. TOC measures organic residue and conductivity measures ionic contamination. Both serve as proxies for cleanliness that go well beyond what eyes can see.
For independent labs, detecting contamination early and building basic validation habits is far more achievable than most researchers expect. Conductivity testing strips are inexpensive. Visual inspection under light is always available.
| Sign to monitor | Possible cause | Immediate action |
|---|---|---|
| Cloudy solution | Microbial growth or insoluble aggregates | Discard, do not use |
| Floating particles | Poor filtration or contaminated glassware | Discard, review cleaning |
| Color change | Oxidation, degradation, or contamination | Discard, check storage |
| Residue on glassware | Inadequate cleaning | Full cleaning cycle, re-validate |
| IPA wipe leaves residue | Low-quality IPA or contaminated swab | Replace IPA source |
Pro Tip: For validating reusable glass in a home or small lab, fill clean glassware with deionized water, agitate briefly, and test the rinse water with a conductivity strip. A result below 1.3 µS/cm indicates acceptable ionic cleanliness and review cleaning and sterilization tips for more detailed protocols.
How EU guidance shapes sterile preparation for independent researchers
Regulatory frameworks are not just for manufacturers. They set the reasoning behind every practical step described above and help you decide what level of rigor is genuinely necessary for your specific context.
What Annex 1 means for your setup
The revised EU GMP Annex 1 risk-based approach to aseptic processing is explicitly lifecycle-driven, covering Contamination Control Strategy, media fills (simulated preparation runs), and continuous environmental monitoring. It positions sterility assurance not as a one-time event but as an ongoing, documented process across the full preparation cycle.
For independent researchers, this translates into several non-negotiable principles regardless of setting:
- Solvent selection must be validated for injection use. There is no workaround.
- Technique must be consistent across every preparation, not just the first few.
- Environmental controls must be appropriate to the risk level of the preparation.
- Documentation matters. Date, lot, solvent, concentration, and handler records protect both safety and research integrity.
- Choosing sterile or bacteriostatic water is a decision that should be based on your specific compound and intended use, not convenience alone.
The key difference between EU Annex 1 and some other regulatory frameworks is its lifecycle-driven compliance philosophy. Risk is assessed at every stage, not just at the point of final product inspection. That mindset is directly applicable to independent researchers even without a GMP license.
Where adaptation is acceptable, and where it is not
Home and small-lab setups can reasonably adapt laminar flow requirements by creating dedicated clean zones with filtered air or controlled enclosures. They can use IPA disinfection as a substitute for validated surface sterilization in lower-risk contexts.
What cannot be adapted or skipped: solvent sterility, single-use equipment for critical contact points, and documentation of preparation parameters. These are where the regulatory framework and practical safety align completely.
What standard guides won’t tell you about real-world sterile solution prep
Here is an observation from working with researchers across the UK and Europe: the greatest sterility failures do not come from ignorance. They come from time pressure. A researcher rushing a prep because a sample window is closing, a home user impatient for IPA to dry, a lab that reuses a syringe “just once” because the replacement box is in the other room. These are the real contamination events.
Even experienced researchers struggle with genuinely sterile conditions in home or adapted lab settings. The honest truth is that “good enough” in sterile work is a moving target. What passes without incident 49 times can produce a catastrophic failure on the 50th, and there will be no way to trace it back without documentation.
The lessons we see repeated most often: cleaning corner-cuts with reusable glassware, confusion between sterile water and distilled water (they look identical), and overconfidence about environmental controls after early successes. Each of these is addressable, but only if you go in expecting them.
Triage your risk deliberately. The solvent you use and how you access the vial are non-negotiable. The cleanliness of a secondary work surface or the brand of your lint-free wipes are not. Learn to tell the difference, so that your discipline is concentrated where it actually changes outcomes.
The resources at solution prep realities are a strong starting point for understanding where that line sits in practical terms.
Pro Tip: Build a one-page preparation checklist specific to your setup and run through it every single time. Not as a formality. As a brake on the time pressure that causes most real-world failures.
Get reliable sterile solutions and guidance for your lab
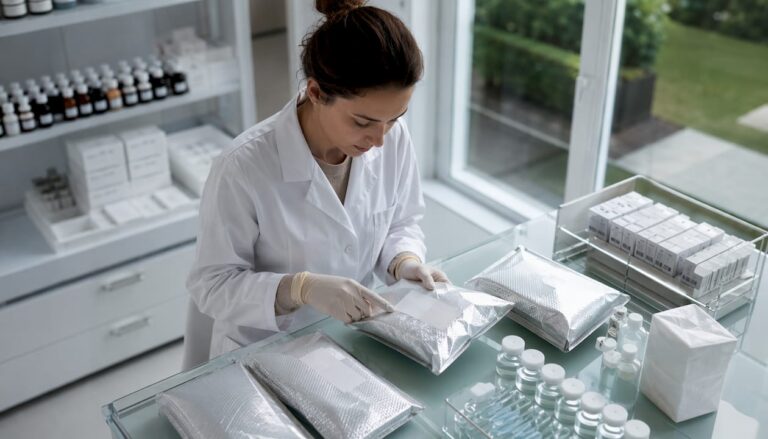
Knowledge without the right supplies only gets you halfway. If your sterile preparation process is sound but your solvent source is uncertain, the whole effort is undermined. Herbilabs supplies research-grade bacteriostatic water and injectable diluents manufactured to strict purity standards, with full traceability and validated supply chains across the UK and Europe.
Whether you need a clear breakdown of solvent selection, a reliable sterile reconstitution solution for multi-dose peptide research, or guidance on safe storage tips to protect your preparations after reconstitution, Herbilabs has the products and the expertise to support your work. Trusted by independent researchers and institutions across Europe, the Herbilabs range is built for the standards your research demands.
Frequently asked questions
Can I use tap or distilled water to prepare a sterile solution for peptides?
No. Only use water clearly labeled for injection. Tap or distilled water is unsafe and risks serious microbial and endotoxin contamination.
What’s the difference between bacteriostatic and sterile water?
Bacteriostatic water contains 0.9% benzyl alcohol as a preservative for multi-use vials. Sterile water for injection lacks preservatives and is intended for single use or limited exposure scenarios only.
How do I know if my preparation is truly sterile?
Sterility goes far beyond visual cleanliness. Validated cleaning and monitoring using methods like TOC testing and conductivity measurement are required to confirm no microbial contamination remains.
Are home protocols enough to meet EU sterile compounding standards?
No. Home or DIY methods provide useful practical technique reminders, but they do not replace EU GMP Annex 1 or formal compounding standards for verified sterile safety.
What’s a common mistake that leads to contamination?
Poor stopper disinfection, improper solvent addition mechanics such as shaking instead of rolling, or using non-sterile tools are among the most impactful and most preventable contamination sources.