Private Label, White Label, Wholesale partnerships available - EU, USA and UK - Free shipping from €75

Essential Sterile Lab Techniques for Safe Peptide Research
Master essential sterile lab techniques for peptide research. Learn step-by-step aseptic protocols, tool requirements, and contamination prevention strategies for independent researchers in Europe.
TL;DR:
- Proper aseptic technique reduces contamination and ensures sample integrity in peptide research.
- Hand hygiene, workspace prep, and maintaining field integrity are critical steps for effective sterility.
- Human factors like fatigue and distraction significantly impact contamination risk in independent labs.
Contamination does not announce itself. One lapse in aseptic technique, a forgotten glove change or an unattended sterile field, and weeks of peptide research can be invalidated in minutes. Breaks in aseptic technique directly cause contamination events that compromise both sample integrity and researcher safety. For independent researchers working outside institutional lab settings, the margin for error is even smaller. This article gives you a practical, criteria-based framework covering the most important sterile lab techniques, the tools you need, the mistakes to avoid, and how European compliance considerations should shape your protocol.
Table of Contents
- Criteria for effective sterile lab technique
- Sterile lab techniques checklist: Step-by-step essentials
- Essential tools and materials for effective sterile technique
- Avoiding common mistakes and minimizing contamination
- Situational guidelines and advanced considerations
- Why researchers underestimate the human factor
- Elevate your research with Herbilabs
- Frequently asked questions
Key Takeaways
| Point | Details |
|---|---|
| Hand hygiene is crucial | Proper hand hygiene eliminates most microbes and is the foundation of sterile technique. |
| Common tools are essential | Equipping your lab with the right sterile materials prevents avoidable contamination. |
| Mistakes can be minimized | Most contamination arises from air or improper handling—following a checklist greatly reduces risk. |
| Techniques must match risk | Tailor your sterile practices to fit research context, compliance level, and material sensitivity. |
Criteria for effective sterile lab technique
Before you can execute sterile technique reliably, you need to understand what success actually looks like. The goal is not just “clean enough.” It is a measurable, reproducible reduction in microbial load across every surface, tool, and airspace involved in your work.
Core sterile lab techniques center on reducing microbes in the workspace and ensuring proper hand hygiene. From there, the criteria expand into three main areas:
- Microbe load reduction: Every surface and instrument entering the sterile field must be treated to eliminate or minimize viable microorganisms.
- Field integrity: The sterile field must remain unbroken from setup to procedure completion. Any breach, no matter how brief, requires field replacement.
- Human and airborne contamination prevention: Researcher behavior, including movement, talking, and proximity, is one of the biggest contamination variables in independent lab settings.
One distinction worth clarifying: aseptic technique refers to practices that prevent contamination during procedures, while sterile technique means all items are completely free of viable microorganisms. In most independent peptide labs, you are working at the aseptic level, which is appropriate, but only if your execution is rigorous.
For European researchers, GMP Volume 4 and WHO technical guidelines both emphasize documented procedures and validated cleaning agents. Even if you are not running a licensed facility, aligning with these standards protects your data and your safety. You can find a solid starting point in sterilization tips that map directly to independent lab contexts.
Pro Tip: If your research involves reconstituting peptides for repeated use, default to full sterile setup rather than basic aseptic technique. The additional time investment is trivial compared to the cost of a contaminated batch.
Sterile lab techniques checklist: Step-by-step essentials
With these criteria in mind, here is your essential list of sterile lab techniques, step by step.
Hand hygiene, donning sterile gloves and gowns, tool sterilization, and workspace prep are the core steps that underpin every successful sterile procedure. Here is how to execute them in sequence:
- Wash hands thoroughly using antiseptic soap for at least 60 seconds, covering all surfaces including between fingers and under nails.
- Don sterile gloves and gown before touching any equipment. Gloves should be changed immediately after any potential contamination event.
- Prepare your workspace by wiping all surfaces with 70% isopropyl alcohol (IPA). Allow full contact time, typically 30 seconds, before placing any items.
- Lay out your sterile field using a sterile drape or pad. Open sterile packaging without reaching over the field.
- Sterilize tools using appropriate methods. For reusable metal instruments, flame sterilization followed by a full cool-down period prevents heat transfer contamination.
- Minimize air movement by keeping doors closed, limiting researcher movement, and avoiding talking directly over the sterile field.
- Maintain field supervision at all times. An unattended sterile field is a compromised field.
For peptide reconstitution specifically, a few additional steps apply:
- Wipe vial septa with a fresh IPA swab before every needle insertion.
- Use safe research solutions such as bacteriostatic water rather than tap or distilled water.
- Draw and inject slowly to prevent aerosol generation inside vials.
Pro Tip: Print this checklist and laminate it. Posting it at eye level in your workspace creates a behavioral cue that reduces skipped steps, especially during longer sessions when attention drifts.
Essential tools and materials for effective sterile technique
Having listed the required steps, let’s clarify which tools and materials are truly essential for executing these techniques.
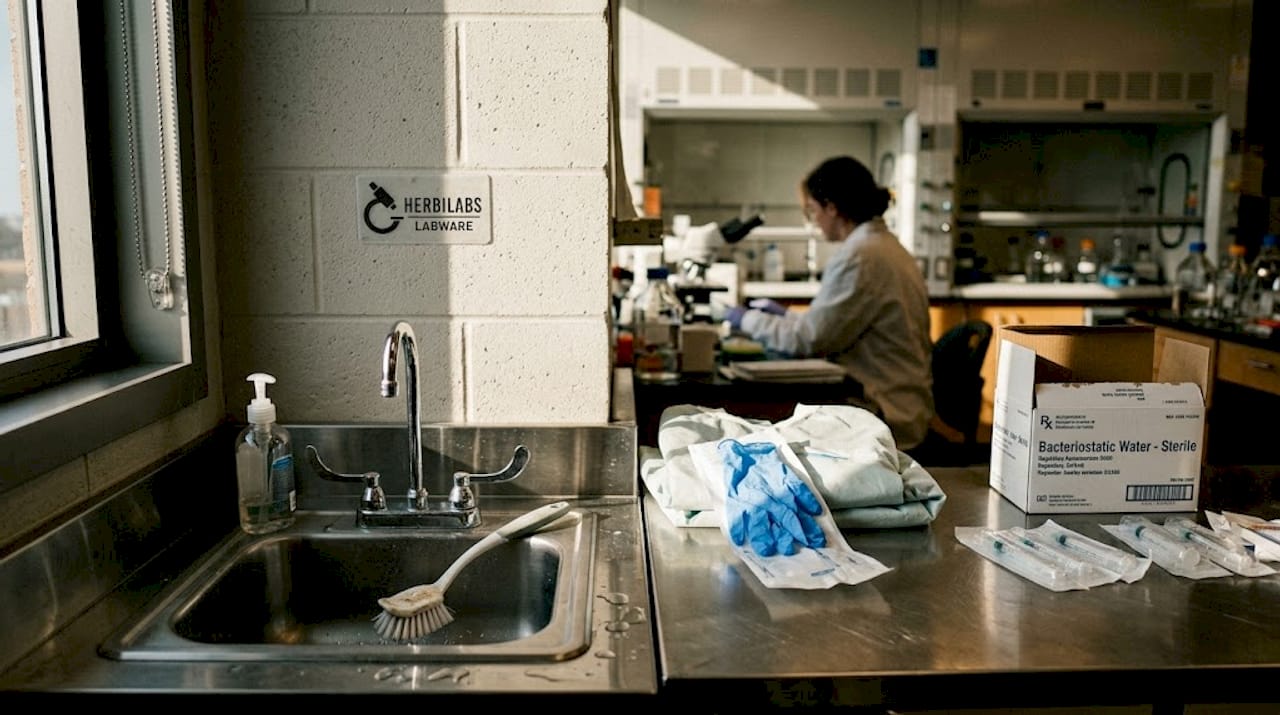
Equipment for sterile procedures includes a sink, scrub brush, antiseptic soap, sterile gowns and gloves, and for peptide reconstitution, bacteriostatic water and alcohol swabs. Beyond this baseline, independent researchers working with peptides need a focused toolkit.
| Material | Application | Aseptic notes |
|---|---|---|
| Bacteriostatic water | Peptide reconstitution and storage | Contains 0.9% benzyl alcohol; inhibits microbial growth between uses |
| 70% isopropyl alcohol | Surface and septum disinfection | Must reach full contact time before use |
| Sterile syringes and needles | Reconstitution and transfer | Single use only; never recap used needles |
| Sterile gloves (nitrile or latex) | Hand barrier protection | Replace after any contamination event |
| Sterile drape or pad | Field establishment | Open packaging without reaching over field |
| Alcohol swabs | Vial septum prep | One swab per wipe; never reuse |
| Sharps disposal container | Safe needle disposal | Required for all injectable research setups |
A few materials deserve special attention. Bacteriostatic water is not interchangeable with sterile water for peptides intended for repeated use. Its benzyl alcohol content provides ongoing microbial suppression, which matters when a vial is accessed multiple times over days or weeks. Sterile gauze is also underrated: it provides a clean surface for resting tools without contaminating the primary sterile field.
For a broader overview of what belongs in a research-grade setup, essential labware covers the full spectrum of consumables and durable equipment worth having on hand.
- Store all sterile materials in sealed packaging until the moment of use.
- Inspect packaging for tears or moisture before opening.
- Dispose of all single-use items immediately after the procedure.
Avoiding common mistakes and minimizing contamination
Even the best checklists are only as good as their execution. Here is how to avoid costly mistakes.
Most contamination comes from airborne microbes, then surfaces, then human contact; proper technique reduces contamination from 20% to under 3%. That gap between 20% and 3% is entirely within your control.
“Contamination events in independent research settings are almost always technique failures, not equipment failures. The protocol works when the researcher works the protocol.”
| Scenario | Correct technique | Incorrect technique |
|---|---|---|
| Entering the sterile field | Reach from the side, keep hands visible | Reach over the top of the field |
| Applying disinfectant to tools | Spray onto gauze, then wipe | Spray directly onto sterile surface |
| Leaving the workspace briefly | Replace sterile drape or restart field setup | Leave field open and unattended |
| Changing gloves mid-procedure | Remove, dispose, re-don new sterile pair | Pull gloves tighter and continue |
| Talking near the field | Wear a mask, face away from field | Talk freely while leaning over work area |
The most common errors researchers make are subtle. Airflow disruption from opening a door mid-procedure, applying IPA directly onto a sterile surface instead of wiping with treated gauze, or skipping the cool-down period after flame sterilization are all frequent offenders. Each one feels minor in the moment and significant in the outcome.
To avoid contamination steps becoming a reactive exercise, build a brief post-procedure audit into your routine. Review what went as planned and flag any deviations. Over time, this creates a personal lab safety checklist that reflects your specific workspace and workflow.
- Document every deviation, no matter how small.
- Review your protocol after any contamination event before resuming work.
- Treat any doubt about field integrity as confirmation of compromise.
Situational guidelines and advanced considerations
Different labs face varying risks and requirements. Here is how to refine your approach for special scenarios.
Risk group assessment drives safety needs; BSL standards may influence protocols for independent researchers working at the boundary of standard peptide research and more complex biological work. Knowing when to escalate your setup is as important as knowing the baseline.
Here is how to think about situational adjustments:
- BSL-1 work (non-pathogenic peptide research, standard reconstitution): Basic aseptic technique with IPA, sterile gloves, and a clean workspace is sufficient.
- BSL-2 work (work involving human-derived materials or opportunistic pathogens): A biosafety cabinet (BSC) becomes necessary, along with enhanced PPE and documented decontamination procedures.
- Upskilling triggers: If you are scaling batch size, increasing reconstitution frequency, or working with novel peptide sequences, elevate your technique level before the risk increases, not after.
- EudraLex Volume 4 (EU GMP): Independent researchers in Europe should be familiar with Annex 1 on sterile manufacturing. While it targets licensed facilities, its contamination control logic applies directly to independent lab settings.
- WHO guidelines: The WHO’s Good Manufacturing Practices for sterile pharmaceutical products provide a useful benchmark for aseptic area design and personnel behavior.
- Documentation: Keep a written log of every reconstitution event, including materials used, lot numbers, and any deviations. This is standard practice in compliant labs and invaluable for troubleshooting.
- Environmental monitoring: Periodic surface swab testing of your workspace, even informally, gives you objective data on whether your technique is holding up over time.
For a clear breakdown of what sterility actually means in the context of lab products, sterility explained is worth reviewing before you advance your protocol.
Why researchers underestimate the human factor
Most contamination discussions focus on equipment, materials, and protocols. That is the right place to start, but it misses the most consistent variable in any sterile lab: the person running it.
In institutional settings, technique is reinforced constantly through supervision, peer review, and mandatory retraining. Independent researchers do not have that infrastructure. What they have instead is self-discipline and the willingness to treat their own protocol as seriously as any audited facility would.
The uncomfortable reality is that fatigue, distraction, and overconfidence are the leading causes of technique failure in independent labs. Not bad equipment. Not substandard materials. Researcher behavior. A tired researcher skips the cool-down after flame sterilization. A confident one stops wiping vial septa after the first few uses because “it has been fine so far.”
Building sterile technique into muscle memory, not just into a checklist, is what separates researchers who get consistent results from those who get intermittent ones. The checklist is the floor, not the ceiling. Treat every session as if it is being audited, because your data quality depends on it.
Elevate your research with Herbilabs
Your sterile technique is only as strong as the materials you work with. Cutting corners on reconstitution solutions introduces contamination risk that no amount of careful procedure can fully offset.

At Herbilabs, we manufacture bacteriostatic water and sterile diluents to strict purity standards, purpose-built for independent peptide researchers across the UK and Europe. Every batch is produced in a dedicated facility with rigorous quality control, so you can focus on your protocol rather than questioning your inputs. Whether you need single units or wholesale quantities, our research-grade products are ready to ship with reliable delivery and full customer support. Give your research the foundation it deserves.
Frequently asked questions
What is the single most important sterile lab technique?
Effective hand hygiene is the most critical sterile technique, reducing microbial load by over 99.9%. Every other step in your protocol depends on starting with clean hands.
How does air contamination occur in a sterile lab?
Airborne microbes account for 56 to 72% of contamination events, typically introduced through poor airflow management, open sterile fields, or unnecessary researcher movement during procedures.
Can I substitute bacteriostatic water with sterile water for peptide research?
Bacteriostatic water is the recommended choice for peptide reconstitution because its benzyl alcohol content provides ongoing antimicrobial protection. Sterile water is only appropriate when the solution will be used immediately and with strict aseptic technique throughout.
How can I tell if my sterile field has been compromised?
If any non-sterile object contacts the field, or if the field is left unattended even briefly, treat it as contaminated and replace it entirely before continuing. When in doubt, restart.
Are biosafety cabinets mandatory for all sterile lab work?
Biosafety cabinets are not required for basic peptide handling or direct microscopy, but become necessary when working with aerosol-generating procedures or BSL-2 materials.