Private Label, White Label, Wholesale partnerships available - EU, USA and UK - Free shipping from €75
Common Lab Reconstitution Errors: What Researchers Must Know
Learn what are common lab reconstitution errors and how to avoid them. Enhance data accuracy and integrity with practical tips for researchers.
TL;DR:
- Calculation errors, especially ignoring peptide purity correction, are the most underestimated source of bias in lab reconstitution. Sterile technique failures, like reuse of needles and contamination, can invalidate entire experiments or pose safety risks. Handling mistakes, such as vortexing or injecting solvent directly onto powder, damage peptides and reduce biological activity. Proper storage within 30 minutes, aliquoting, and verification of solution integrity are critical to maintaining sample quality and experimental reproducibility.
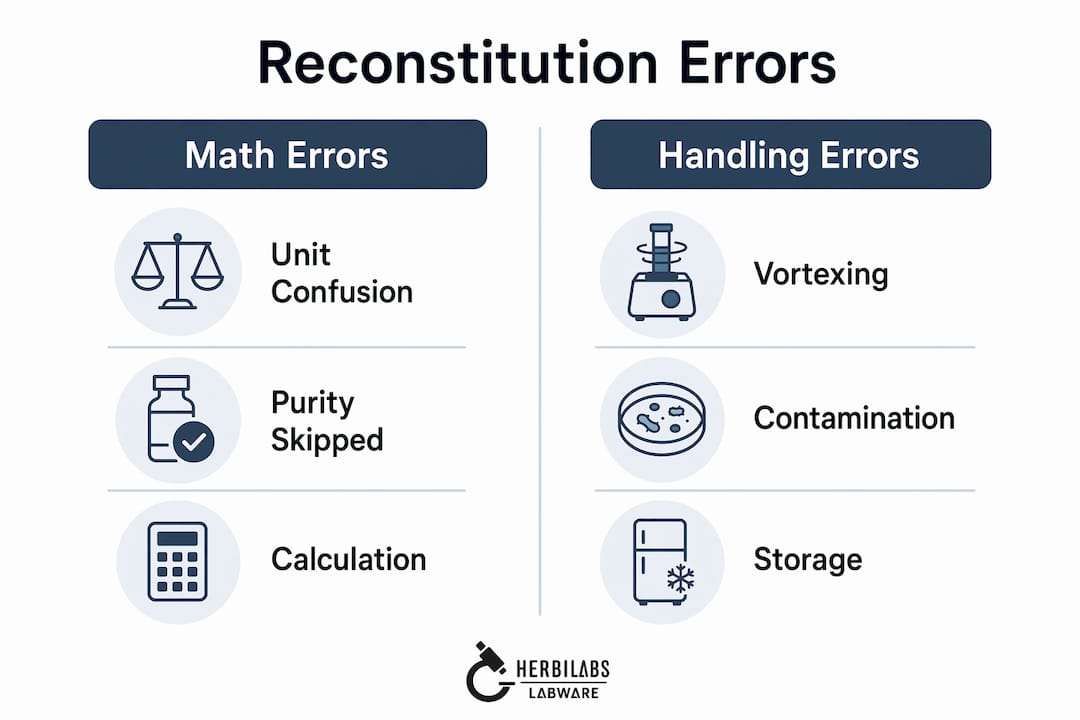
Lab reconstitution errors are mistakes made during the preparation of lyophilized reagents or peptide solutions that directly compromise concentration accuracy, sample integrity, and experimental reproducibility. These errors span four distinct categories: calculation mistakes, sterile technique failures, physical handling missteps, and storage oversights. Understanding what are common lab reconstitution errors, and more precisely where they occur in the workflow, is the fastest way to eliminate systematic inaccuracies before they corrupt your data. This article covers each category with concrete examples, quantitative illustrations, and workflow corrections you can apply immediately.
What are the most common math and concentration errors in reconstitution?
Calculation errors are the most underestimated source of systematic bias in peptide reconstitution. They do not produce obvious failures. They produce results that look plausible but are consistently off by a reproducible margin, which makes them especially dangerous in longitudinal studies.
The two most frequent math mistakes are unit confusion and skipping purity correction. Unit confusion typically involves mixing milligrams with micrograms, or milliliters with microliters, during volume calculations. A researcher calculating a 1 mg/mL solution who accidentally works in µL instead of mL will prepare a solution 1,000 times more concentrated than intended. That error is usually caught. The subtler version, confusing a 0.5 mL draw with a 500 µL draw on a misread syringe, is far more common and rarely noticed.
Purity correction is the more systematic problem. Ignoring peptide purity and using nominal vial weights causes concentration errors typically in the 2 to 7% range. That offset is reproducible across every assay run, which means it never triggers an outlier flag. A peptide vial labeled 5 mg at 95% purity actually contains 4.75 mg of active compound. Reconstituting that vial as though it contains 5 mg produces a solution that is 5.3% more dilute than your target. Every downstream dosing decision, dose-response curve, and statistical comparison inherits that error.
The correct workflow requires three steps before you draw a single drop of solvent:
- Pull the Certificate of Analysis (COA) and record the stated purity percentage.
- Calculate the active mass: nominal weight × (purity ÷ 100).
- Calculate your solvent volume based on the active mass, not the labeled weight.
Systematic math errors like skipping purity correction cause reproducible offsets in every assay result, often unnoticed until data anomalies appear across multiple experiments. Catching this at the calculation stage costs 30 seconds. Catching it after three months of data collection costs the entire dataset.
Pro Tip: Use separate syringes for reconstitution and dosing. A 1 to 3 mL syringe is recommended for adding solvent during reconstitution, while insulin syringes are reserved for dosing only. Mixing these up introduces additional volume measurement errors on top of any calculation mistakes.
How do sterile technique mistakes impact reconstitution quality?
Sterile technique failures are the second most common category of lab reconstitution mistakes, and they are the ones most likely to produce catastrophic rather than subtle errors. A contaminated solution does not just skew a data point. It introduces bacterial growth, endotoxins, or particulates that can invalidate an entire experiment or, in injectable research applications, create serious safety concerns.
The most frequent sterile technique errors include:
- Reusing needles between vials. Each pass through a rubber stopper dulls the needle tip and can carry microbial contamination from one vial to the next. The one needle, one vial principle is non-negotiable for reducing cross-contamination and microbial growth.
- Skipping stopper swabbing. Rubber stoppers accumulate particulates and surface microbes during storage and handling. Swabbing with 70% isopropyl alcohol and allowing it to dry completely before needle insertion takes under 10 seconds and eliminates a significant contamination vector.
- Working in uncontrolled environments. Open bench reconstitution without a laminar flow hood or biosafety cabinet exposes solutions to airborne particulates. For high-risk preparations, preparation environment directly affects contamination risk, and systematic risk scoring guides where aseptic work should occur.
- Touching non-sterile surfaces mid-procedure. Glove contact with bench surfaces, phone screens, or unsterilized equipment between steps transfers contamination directly to the preparation area.
The consequences of contamination extend beyond visible turbidity. Bacterial endotoxins are invisible, heat-stable, and survive standard filtration. A solution that looks clear can still carry endotoxin loads sufficient to interfere with cell-based assays or inflammatory response studies. Reviewing sterile injection practices before each reconstitution session is a practical habit that pays dividends in data quality.
Pro Tip: Set up your workspace before opening any vials. Lay out all syringes, needles, swabs, and solvent in a clean field. Once you begin, your hands should not leave the sterile zone until the vial is sealed and labeled.
What physical handling errors occur during reconstitution and how do they affect peptides?
Physical handling errors are the most visible category of lab reconstitution issues, yet they remain common because the correct technique feels counterintuitive. Researchers trained on vigorous mixing for other solutions often apply the same approach to lyophilized peptides, with damaging results.
The two primary physical mistakes are vortexing and direct solvent injection onto the powder cake.
| Handling method | What happens to the peptide | Recommended alternative |
|---|---|---|
| Vortexing or shaking vigorously | Air bubbles and shear stress denature peptide structures and reduce biological activity | Gentle swirling in a circular motion |
| Injecting solvent directly onto powder | Jet force disrupts the lyophilized cake, causes foaming, and traps undissolved particles | Direct solvent along the inner vial wall |
| Forcing dissolution with heat | Elevated temperature accelerates degradation of thermolabile peptides | Allow dissolution at room temperature with patience |
| Repeated inversion without rest | Prolongs mechanical stress and delays complete dissolution | Swirl, then let stand for 2 to 5 minutes |
Vortexing introduces shear forces that break peptide bonds in longer-chain sequences. The resulting solution may appear dissolved, but activity assays will show reduced potency compared to a gently prepared control. Directing solvent against the vial wall rather than onto the powder cake allows the liquid to flow down and under the cake, dissolving it from below without mechanical disruption. This approach also prevents the foaming that occurs when a solvent jet hits dry powder directly, which traps air and makes accurate volume measurement difficult.
Reconstitution is best understood as a chain of measurements requiring stepwise verification: pre-calculation of desired concentration, correct syringe selection, and cross-checking volume draws prevent cascading errors. Physical handling is one link in that chain, and a break at this stage undermines every careful calculation made beforehand.
How do temperature and storage errors influence reconstituted sample integrity?
Temperature and storage errors are the final category of common reconstitution mistakes, and they are the most likely to occur after the reconstitution itself is complete. A perfectly prepared solution can degrade to uselessness within hours if handled incorrectly post-preparation.
Key storage mistakes to avoid:
- Leaving solutions at room temperature too long. Reconstituted peptides left beyond 30 minutes at room temperature show measurable potency loss. Some peptides degrade significantly within hours at 20 to 25°C. Refrigeration at 2 to 8°C within 30 minutes of preparation is the standard practice.
- Repeated freeze-thaw cycles. Each freeze-thaw cycle introduces ice crystal formation that physically damages peptide structures. Researchers who freeze an entire vial and thaw it multiple times across experiments compound this damage with every cycle.
- Using inappropriate containers. Certain peptides adsorb to polypropylene or polystyrene surfaces, reducing effective concentration in the solution without any visible sign of loss. Low-binding borosilicate glass or certified low-adsorption tubes are the correct choice for sensitive compounds.
- Ignoring light sensitivity. Several peptides and reagents degrade under UV exposure. Storing reconstituted solutions in clear vials on an open bench accelerates photodegradation. Amber vials or foil wrapping are standard mitigations.
Post-reconstitution sample handling strongly influences stability. Proper aliquoting and storage minimize peptide degradation and maintain assay reliability across multiple use sessions. Aliquoting into single-use volumes before freezing eliminates the freeze-thaw problem entirely and is the most practical solution for researchers working with limited peptide quantities over extended timelines. Reviewing safe storage practices for reconstituted solutions is worth building into your standard operating procedure.
Pro Tip: Label every aliquot with the preparation date, concentration, purity-corrected active mass, and solvent used. Unlabeled aliquots are a leading cause of dosing errors weeks after the original reconstitution.
Why is verifying the final solution and assessing risk critical in reconstitution?
Skipping final verification is one of the most common lab reconstitution issues precisely because it feels redundant after a careful preparation. It is not. Verification catches errors that occurred at every prior step.
A complete verification protocol covers three checks. First, visual clarity: the solution should be clear and free of particulates, cloudiness, or unusual color. Turbidity indicates incomplete dissolution, contamination, or precipitation. Second, concentration confirmation: cross-check your calculated volume against the target concentration using the COA purity value. Third, COA review: failing to check the Certificate of Analysis increases the risk of using inaccurate or degraded samples, particularly when working with reagents from new lot numbers.
Environmental risk assessment adds a layer of protection that most bench protocols overlook entirely. The NHS Specialist Pharmacy Service risk scoring framework assigns numerical scores to preparation conditions. A risk score of 8 or higher indicates that preparation should occur in a controlled aseptic unit rather than on an open bench. Factors that raise the score include injectable route, multi-dose vials, complex manipulations, and extended in-use periods.
Analytical assays validated for undiluted drugs may not apply to reconstituted samples. Researchers must confirm assay suitability post-reconstitution, particularly when dilution ratios alter the matrix composition. Documenting your reconstitution procedure, including solvent choice, volume, purity correction calculation, and storage conditions, creates a reproducible record that supports troubleshooting when results deviate from expectations.
| Verification step | What it catches |
|---|---|
| Visual clarity check | Particulates, precipitation, incomplete dissolution |
| Concentration cross-check | Math errors, unit confusion, purity correction omissions |
| COA review | Lot-to-lot purity variation, degraded starting material |
| Environmental risk score | Contamination risk from preparation location |
| Assay suitability confirmation | Dilution-related matrix effects on downstream analysis |
Key takeaways
Preventing lab reconstitution errors requires applying purity correction at calculation, maintaining strict sterile technique, handling peptides gently, refrigerating solutions within 30 minutes, and verifying every preparation before use.
| Point | Details |
|---|---|
| Apply purity correction | Multiply nominal weight by COA purity percentage to calculate true active mass before reconstituting. |
| Follow one needle, one vial | Never reuse needles between vials; swab stoppers with 70% isopropyl alcohol before every insertion. |
| Avoid vortexing | Direct solvent along the vial wall and swirl gently to prevent shear-induced peptide denaturation. |
| Refrigerate within 30 minutes | Store reconstituted solutions at 2 to 8°C promptly and aliquot to avoid repeated freeze-thaw damage. |
| Verify before use | Check visual clarity, confirm concentration against COA, and assess preparation environment risk score. |
The errors nobody talks about until the data falls apart
I have reviewed reconstitution workflows across a range of research settings, and the pattern is consistent. The errors that cause the most damage are not the dramatic ones. Nobody misses a 1,000-fold dilution mistake. The errors that quietly corrupt months of data are the 5% purity correction omissions, the 45-minute bench sit before refrigeration, and the vortex habit carried over from a different protocol.
What I find most telling is how rarely researchers document their reconstitution steps in the same detail they apply to their assay protocols. The reconstitution is treated as a pre-step, something to get through before the real experiment begins. That framing is the root cause of most preventable errors. The reconstitution is the experiment. Every measurement you make downstream depends on what happened in that vial.
The purity correction example is the clearest illustration. A consistent reagent quality check takes 30 seconds and eliminates a systematic offset that would otherwise appear in every data point. Researchers who skip it are not being careless. They simply do not realize the offset exists because it never produces an obvious anomaly. It just shifts the baseline.
My practical recommendation: treat reconstitution as a documented procedure with a written checklist, not a memorized habit. Habits drift. Checklists do not.
— Ragnar
Start with the right solvent and eliminate one error category entirely
The quality of your reconstitution solvent determines your contamination baseline before you perform a single technique step. Using a substandard diluent introduces variables that no amount of careful technique can correct.

Herbilabs supplies research-grade bacteriostatic water manufactured to strict purity standards, specifically designed for multi-use peptide reconstitution in demanding lab environments. Each batch is produced in a dedicated facility with rigorous quality control, giving you a documented, contaminant-free starting point for every preparation. For researchers comparing solvent options, the bacteriostatic vs sterile water guide covers which diluent fits which application. When your solvent is verified, you remove an entire error category from the equation before the protocol even begins.
FAQ
What is the most common reconstitution error in labs?
Skipping purity correction when calculating solvent volumes is the most common reconstitution error. It produces a systematic concentration offset of 2 to 7% that affects every downstream assay without triggering obvious outlier flags.
How do I prevent contamination during reconstitution?
Use a fresh needle for every vial, swab rubber stoppers with 70% isopropyl alcohol before insertion, and work in a clean environment. For high-risk injectable preparations, a controlled aseptic unit is required per NHS Specialist Pharmacy Service guidelines.
How long can a reconstituted peptide solution sit at room temperature?
No longer than 30 minutes. Reconstituted peptides show measurable potency loss at 20 to 25°C within hours. Refrigerate at 2 to 8°C promptly and aliquot into single-use volumes to avoid repeated freeze-thaw cycles.
Why should I avoid vortexing reconstituted peptides?
Vortexing creates shear stress and air bubbles that denature peptide structures and reduce biological activity. Gentle swirling with solvent directed along the vial wall is the correct technique for maintaining peptide integrity.
What does a complete final verification check include?
A complete check covers visual clarity for particulates or turbidity, concentration confirmation against the COA purity value, and an environmental risk score assessment to confirm the preparation location was appropriate for the manipulation performed.