Private Label, White Label, Wholesale partnerships available - EU, USA and UK - Free shipping from €75

Glassware Sterilization Steps for Lab Technicians
Master essential glassware sterilization steps to ensure experimental accuracy. Discover techniques that eliminate contamination and enhance lab results!
TL;DR:
- Proper sterilization of laboratory glassware demands thorough cleaning with detergent and rinses, followed by validated heat methods. Autoclaving at 121°C for 15–45 minutes or dry heating at 160–170°C for 1–2 hours effectively eliminates all microorganisms when protocols are correctly executed. Post-sterilization handling and storage in clean, covered environments prevent recontamination and ensure reliable experimental results.
Glassware sterilization is defined as the complete elimination of all viable microorganisms, including bacterial spores, from laboratory glassware surfaces through heat, chemical, or radiation-based methods. Skipping or shortcutting any of the glassware sterilization steps compromises experimental reproducibility and introduces contamination that invalidates results. Standard methods used in research labs include autoclaving, dry heat sterilization, chemical sterilization with ethanol or hydrogen peroxide, and UV irradiation. Tools like Alconox detergent, deionized water rinse systems, and biological indicators such as Geobacillus stearothermophilus spore strips are integral to a validated protocol. This guide covers every phase from initial cleaning through post-sterilization storage, written specifically for technicians who need precision, not generalities.
What are the essential cleaning steps before sterilizing glassware?
Sterilization fails when residue, biological matter, or detergent film remains on glassware surfaces. Heat cannot penetrate organic debris effectively, meaning a contaminated flask run through an autoclave cycle may still harbor viable organisms. Cleaning is not a preliminary formality. It is the foundation on which sterilization efficacy depends.
Manual scrubbing and detergent selection
Begin by rinsing glassware immediately after use to prevent residues from drying and bonding to the glass. Use a laboratory-grade detergent such as Alconox or Liquinox with appropriately sized brushes to scrub all interior and exterior surfaces. Pay particular attention to the base of volumetric flasks and the inner necks of Erlenmeyer flasks, where biofilm accumulates undetected.
Follow the glassware cleaning procedures outlined in validated lab protocols: scrub with detergent, rinse thoroughly with tap water to remove bulk detergent, then perform multiple deionized water rinses to eliminate mineral residues and any remaining surfactant. Three consecutive deionized water rinses is the accepted minimum for research-grade preparation.
Pro Tip: Persistent stains from biological cultures or chemical residues respond well to a brief soak in dilute nitric acid (5-10%), followed by thorough rinsing with deionized water. Never skip the post-acid rinse sequence, as acid residue interferes with pH-sensitive experiments.
Inspection and drying before sterilization
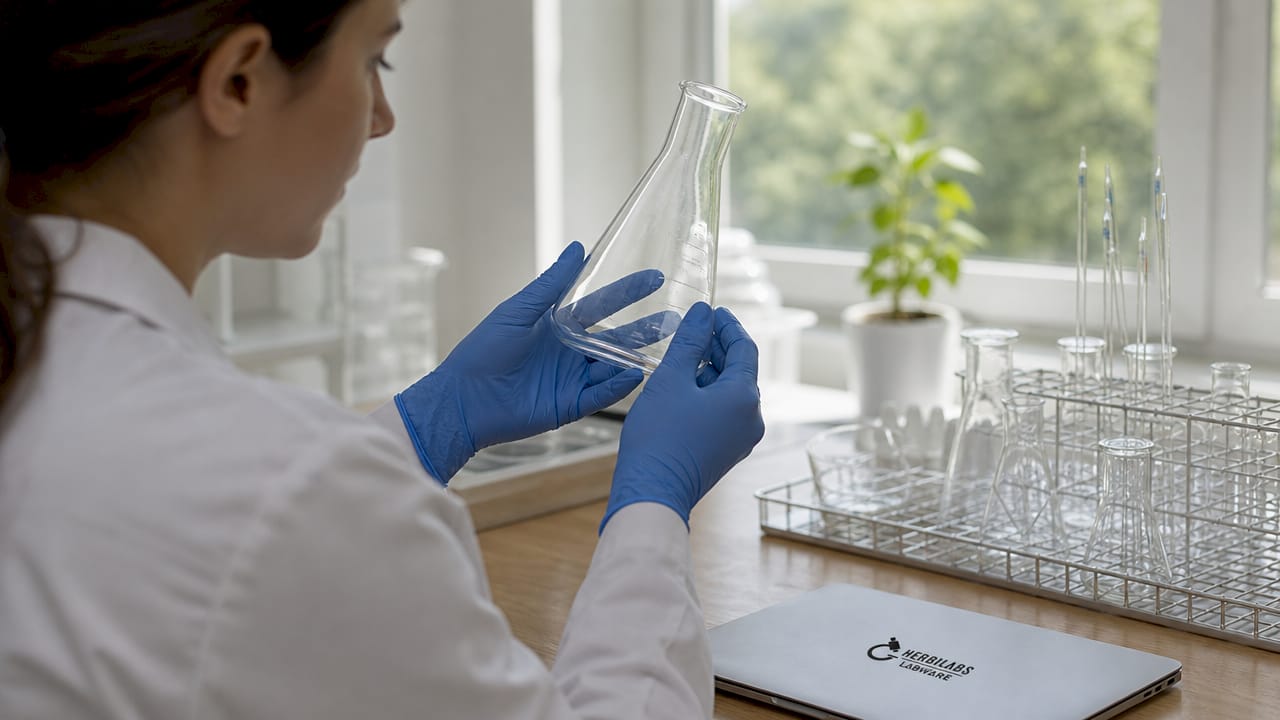
Inspect every item under adequate lighting before loading it for sterilization. Chipped rims, hairline cracks, and etched surfaces harbor microorganisms that neither autoclaving nor dry heat can reliably eliminate. Remove compromised glassware from the sterilization queue and discard it according to your facility’s sharps and broken glass protocol.
Dry glassware completely before placing it in a dry heat oven. Residual moisture on glass surfaces causes uneven heat distribution and can leave mineral deposits after evaporation. Air drying on a clean rack or brief placement in a low-temperature drying oven at 60°C is sufficient. For autoclave runs, complete drying is less critical since steam is the sterilizing agent, but excess pooled water inside containers dilutes steam penetration at the load surface.
The step-by-step glassware sterilization process only works when the cleaning phase is treated with the same rigor as the sterilization phase itself.
How to sterilize glassware using autoclaving: step by step
Autoclaving is the gold standard for most laboratory glassware because moist heat at pressure destroys all microbial life forms, including endospores, more reliably than any other routine method. The standard autoclave protocol requires steam at 121°C and 15 psi for a minimum of 15 to 20 minutes of exposure. That exposure timer starts only after the chamber reaches the target temperature, not when the cycle begins.
Preparing your load correctly
- Loosen screw caps by a half to full turn before loading. Tightly capped containers create pressure differentials that shatter glass during the sterilization phase.
- Cover open flask necks and tube openings with aluminum foil, crimped securely but not sealed, to allow steam entry while preventing post-cycle contamination.
- Arrange items with adequate spacing. Overpacking the autoclave chamber prevents steam from circulating uniformly, creating cold spots where sterilization fails.
- Place glassware in autoclave-safe trays or racks. Never stack items directly on top of each other.
- Select the appropriate cycle. Gravity displacement cycles suit most empty glassware. Pre-vacuum cycles are preferred for porous loads or complex geometries.
Cycle phases and timing
The full autoclave cycle consists of three distinct phases. The purge phase removes air from the chamber, since air pockets block steam contact with surfaces. The sterilization phase maintains temperature and pressure for the required exposure time. The exhaust phase slowly releases pressure before the door is opened.
Dense or large loads require extended sterilization times. Dense loads need 30 to 45 minutes to achieve full steam penetration throughout the load mass. Underestimating this is one of the most common errors in routine lab practice.
Pro Tip: Place a chemical indicator strip inside the center of your load, not just on the outside. External indicators confirm the cycle ran; internal indicators confirm heat penetration reached the load core.
For critical applications, biological indicators containing Geobacillus stearothermophilus spores provide gold-standard cycle verification beyond what chemical indicators can confirm. Run a biological indicator challenge at least monthly or whenever load configurations change significantly.
After the cycle completes, allow the chamber to cool before opening the door fully. Rapid pressure changes and cool air contact with hot glass increase fracture risk. Remove glassware with insulated gloves and allow items to reach room temperature on a clean, non-absorbent surface before handling with bare hands.
Dry heat sterilization steps for glassware when autoclaving is not available
Dry heat sterilization is the correct method for moisture-sensitive glassware or when an autoclave is unavailable. The mechanism differs fundamentally from autoclaving: oxidative destruction of cellular components replaces steam-based protein denaturation. This requires higher temperatures and longer exposure times.
Dry heat sterilization requires either 170°C for 60 minutes or 160°C for 120 minutes to achieve full sterilization. These are minimum parameters, not targets to approach casually.
Step-by-step dry heat protocol
- Confirm glassware is completely clean and fully dry before loading. Any residual moisture converts to steam inside the oven and causes uneven heating.
- Wrap items individually in aluminum foil to protect openings from recontamination after removal. Wrapping also prevents direct contact between items that could cause breakage.
- Arrange wrapped glassware with sufficient spacing inside a convection oven. Convection ovens distribute heat uniformly through forced air circulation. Static ovens create temperature gradients that leave some items under-sterilized.
- Set the oven to the target temperature and begin timing only after the oven reaches that temperature, confirmed by the internal thermometer.
- Maintain temperature throughout the full exposure period without opening the oven door.
- At cycle completion, turn off the oven and allow it to cool passively. Opening the oven before temperature falls below 100°C risks thermal shock and glass cracking.
Pro Tip: Use a calibrated oven thermometer independent of the oven’s built-in display. Built-in sensors frequently read 10 to 15°C higher than actual chamber temperature, leading to under-sterilization at the load surface.
Dry heat vs. autoclaving: a direct comparison
| Parameter | Autoclaving | Dry heat |
|---|---|---|
| Temperature | 121°C | 160-170°C |
| Exposure time | 15-45 minutes | 60-120 minutes |
| Mechanism | Moist heat, protein denaturation | Oxidation |
| Suitable for | Most glassware, liquids | Moisture-sensitive items |
| Sporicidal | Yes | Yes |
| Cycle time | Shorter | Longer |
Comparing sterilization methods for laboratory glassware
Choosing between moist heat and dry heat depends on material sensitivity and experimental requirements. These methods are not interchangeable, and selecting the wrong one compromises either the glassware or the sterilization outcome.
Chemical sterilization using 70% ethanol or 3% hydrogen peroxide disinfects surfaces but does not achieve full sterilization. Chemical methods are surface-level and cannot eliminate bacterial spores or penetrate residues. They are appropriate for bench surface preparation and for glassware that will contact non-critical reagents, not for culture vessels or sterile solution preparation.
UV sterilization requires direct exposure for 30 minutes to several hours and cannot penetrate glass walls, shadowed surfaces, or any physical barrier. UV is useful as an adjunct measure in biosafety cabinets but never as a standalone sterilization method for glassware used in critical experiments.
Specialized glassware with protective coatings, such as PyrexPlus, requires adherence to strict temperature limits during sterilization. Exceeding manufacturer specifications degrades coatings and compromises both the glassware and experimental results.
How to store and handle sterilized glassware correctly
Post-sterilization handling is where contamination most commonly re-enters the workflow. A perfectly sterilized flask becomes a contamination source the moment an ungloved hand contacts the inner surface or an uncovered opening sits exposed on a bench.
Follow these practices without exception:
- Allow glassware to cool completely before removing foil covers or transferring to storage. Handling hot glass increases breakage risk and creates convective air currents that draw in airborne contaminants.
- Keep all openings covered with foil or sealed in sterile autoclave bags until the moment of use. Sterilized glassware stored uncovered in open cabinets accumulates surface contamination within hours in a typical lab environment.
- Store in a clean, dry, dust-free cabinet or dedicated sterile storage area. Avoid areas near sinks, HVAC vents, or high-traffic zones.
- Never touch interior surfaces or rim edges with bare hands. Use powder-free nitrile gloves for all post-sterilization handling.
- Label each item with the sterilization date and method. Sterility is not indefinite. Most facilities apply a 30-day sterility shelf life for foil-wrapped glassware stored under controlled conditions.
Pro Tip: Use sterile solution preparation workflows as a reference for maintaining sterility from glassware through to final reagent preparation. The same contamination control principles apply across both processes.
Key takeaways
Effective glassware sterilization requires thorough cleaning before any heat method is applied, correct cycle parameters matched to the sterilization method, and disciplined post-sterilization handling to prevent recontamination.
| Point | Details |
|---|---|
| Clean before sterilizing | Residue and biofilm block heat penetration; three deionized water rinses are the minimum. |
| Match method to material | Use autoclaving for most glassware; use dry heat for moisture-sensitive items. |
| Autoclave settings matter | 121°C at 15 psi for 15 to 45 minutes depending on load density. |
| Validate every cycle | Use biological indicators monthly and chemical indicators with every load. |
| Store covered and labeled | Foil-wrapped glassware has a 30-day sterility shelf life under controlled storage. |
What I’ve learned from years of watching sterilization protocols fail
Most sterilization failures I’ve encountered don’t happen inside the autoclave. They happen in the two minutes before and after the cycle. A technician loads a flask with the cap fully tightened because it feels safer. Another pulls glassware out while the chamber is still warm and sets it uncovered on the bench to cool. These are not beginner mistakes. They are habits that form when protocols are treated as checklists rather than understood as cause-and-effect chains.
The other underappreciated failure point is cycle validation. Running biological indicators is often treated as a compliance exercise rather than a genuine quality check. In practice, autoclave performance drifts. Door seals degrade. Thermocouples go out of calibration. A monthly biological indicator run catches these issues before they invalidate weeks of experimental data.
My honest recommendation: invest time in understanding your specific autoclave’s performance characteristics. Run a temperature mapping study with a calibrated data logger at least once per year. Know where the cold spots are in your chamber and load accordingly. The protocol is only as good as the equipment executing it, and equipment requires active monitoring, not passive trust.
Balancing sterilization efficacy with glassware longevity is also worth addressing directly. Repeated high-temperature dry heat cycles degrade borosilicate glass over time, increasing brittleness. Rotating glassware out of service on a defined cycle count, not just on visible damage, is a practice most labs skip but few regret adopting.
— Ragnar
Support your sterile workflow with Herbilabs
Sterilized glassware is only one part of a reliable research workflow. The reagents and solutions you introduce into that glassware carry equal weight in determining experimental outcomes. Herbilabs supplies research-grade bacteriostatic water, sterile diluents, and reconstitution solutions manufactured under strict purity controls, designed specifically for researchers who cannot afford contamination at any stage. Whether you are reconstituting peptides or preparing sterile buffers, the quality of your aqueous solutions matters as much as the sterility of your vessels. Explore the bacteriostatic water FAQs for detailed product information, or review the complete bac water guide to understand how sterile diluents integrate into your lab’s sterility standards.
FAQ
What are the basic glassware sterilization steps?
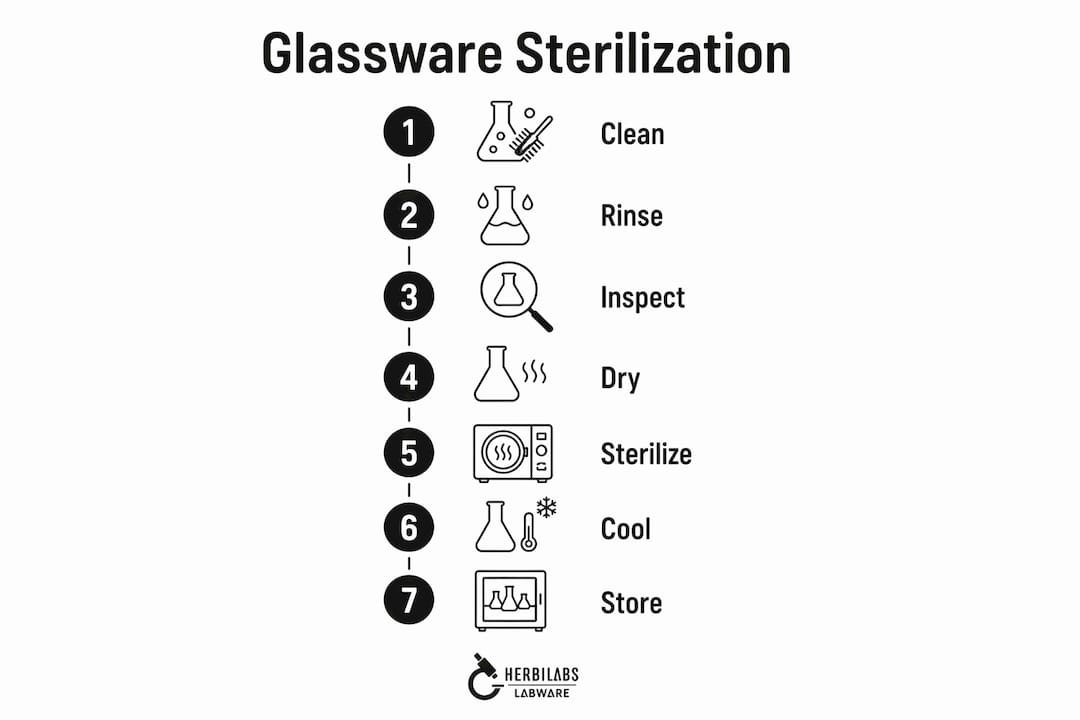
The core steps are thorough cleaning with laboratory detergent, rinsing with deionized water, drying, and then applying the appropriate sterilization method. Autoclaving at 121°C for 15 to 45 minutes or dry heat at 160 to 170°C are the two validated options for complete microbial elimination.
How long does autoclaving take for glassware?
The sterilization timer starts after the chamber reaches 121°C, and the minimum exposure is 15 to 20 minutes for standard loads. Dense or large loads require 30 to 45 minutes to achieve full steam penetration.
Can ethanol replace autoclaving for glassware sterilization?
Ethanol and other chemical agents disinfect surfaces but do not achieve full sterilization. They cannot eliminate bacterial spores and are not appropriate substitutes for autoclaving or dry heat when complete sterility is required.
When should dry heat sterilization be used instead of autoclaving?
Dry heat is the correct choice for moisture-sensitive glassware or when an autoclave is unavailable. It requires 160°C for 120 minutes or 170°C for 60 minutes and must be performed in a convection oven for uniform heat distribution.
How should sterilized glassware be stored?
Sterilized glassware should be stored covered with foil or in sealed sterile bags, in a clean and dust-free cabinet, away from sinks and high-traffic areas. Label each item with the sterilization date and method, and apply a 30-day sterility shelf life under controlled storage conditions.