Private Label, White Label, Wholesale partnerships available - EU, USA and UK - Free shipping from €75
Labware Sanitization Guide for Lab Technicians
Master labware sanitization with our comprehensive guide, ensuring safety and accuracy in your experiments. Discover essential cleaning protocols!
TL;DR:
- Labware sanitization involves removing residues and microbes to ensure accuracy and safety in experiments. Proper protocols include using material-specific detergents, thorough rinsing with sterile water, and validated drying, with strict documentation for compliance. Failure often results from poor record-keeping rather than chemistry faults, highlighting the importance of detailed process control.
Labware sanitization is the process of removing chemical residues, biological contaminants, and microbial populations from laboratory instruments to protect experimental accuracy and personnel safety. Without a structured sanitization protocol, cross-contamination between experiments becomes a real and measurable risk. This guide covers the full spectrum of lab equipment cleaning procedures, from selecting the right detergents and tools to validating your process against compliance standards. Whether you work in pharmaceutical QC, academic research, or peptide science, the principles here apply directly to your bench.
What are the essential tools and materials for labware sanitization?
Effective labware sanitization starts with the right materials. Using the wrong detergent or rinsing with tap water can introduce new contaminants while removing old ones.
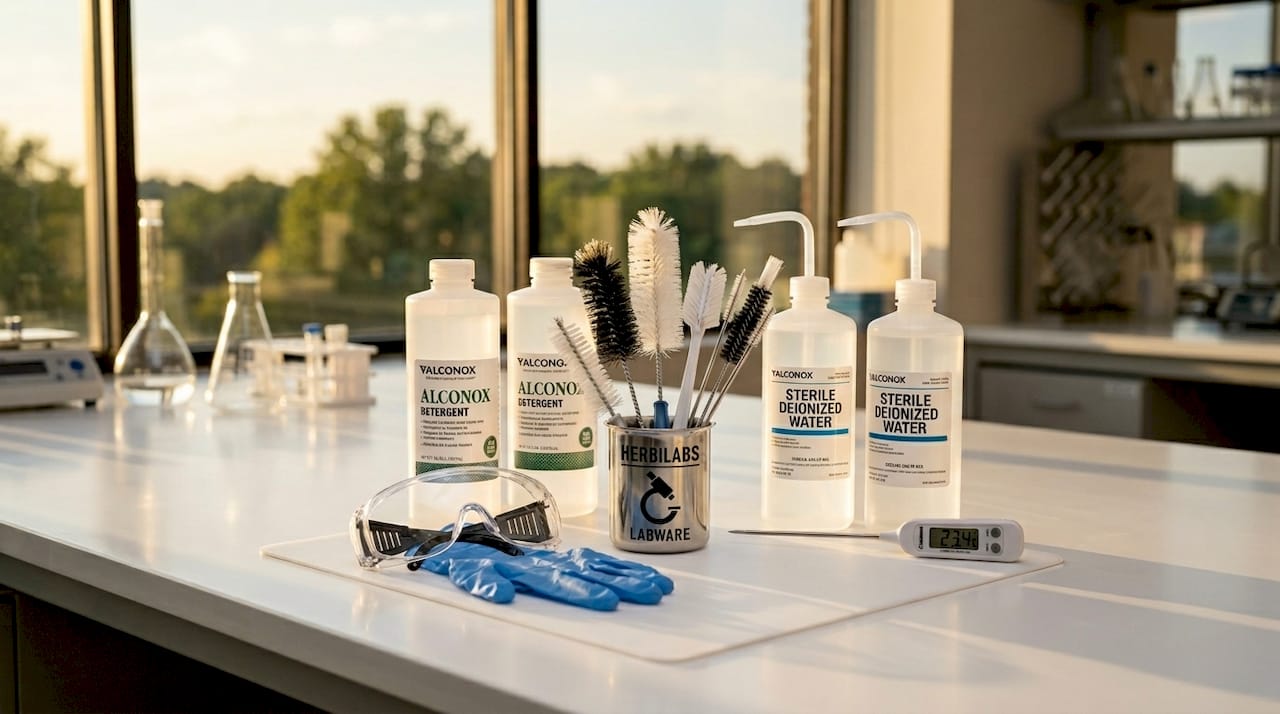
Laboratory-grade detergents are the foundation of any cleaning protocol. Phosphate-free, neutral pH formulations such as Alconox, Decon 90, and Liquinox are the standard choices for glass and plastic labware. Phosphate residues interfere with enzymatic assays and cell culture media, so phosphate-containing household detergents have no place in a research lab. Neutral pH formulations protect sensitive surfaces and reduce the risk of etching borosilicate glass.
Mechanical cleaning tools determine how thoroughly you reach every surface:
- Ultrasonic cleaners (such as Branson or Elma models) use cavitation to dislodge residues from internal geometries that brushes cannot reach
- Nylon-bristle brushes in graduated sizes for manual scrubbing of tubes, flasks, and beakers
- Automated glassware washers (Miele or Smeg laboratory models) for high-throughput cleaning with validated cycle parameters
- Bottle-top dispensers for controlled detergent application
Rinse solutions are not interchangeable. Distilled water removes ionic residues; sterile deionized water is required for the final rinse before sterilization or when preparing solutions for injection-grade applications. The water purity level used in your final rinse directly determines whether residue carryover contaminates downstream experiments.
Personal protective equipment (PPE) is non-negotiable. Nitrile gloves, safety glasses, and a lab coat protect against splashes from concentrated detergents and disinfectants. When working with chlorine-based or peracetic acid disinfectants, a chemical-resistant apron and face shield are required.
| Material type | Recommended detergent | Rinse requirement |
|---|---|---|
| Borosilicate glass | Alconox, Liquinox (neutral pH) | Sterile deionized water |
| Polypropylene plastic | Decon 90 (diluted, low temp) | Distilled water minimum |
| Stainless steel | Neutral pH enzymatic cleaner | Deionized water |
| Ceramic | Mild alkaline detergent | Distilled water |
Pro Tip: Always prepare fresh detergent solutions for each cleaning cycle. Reusing detergent baths concentrates residues and reduces cleaning efficacy, which is one of the most common audit failures in cleaning validation programs.
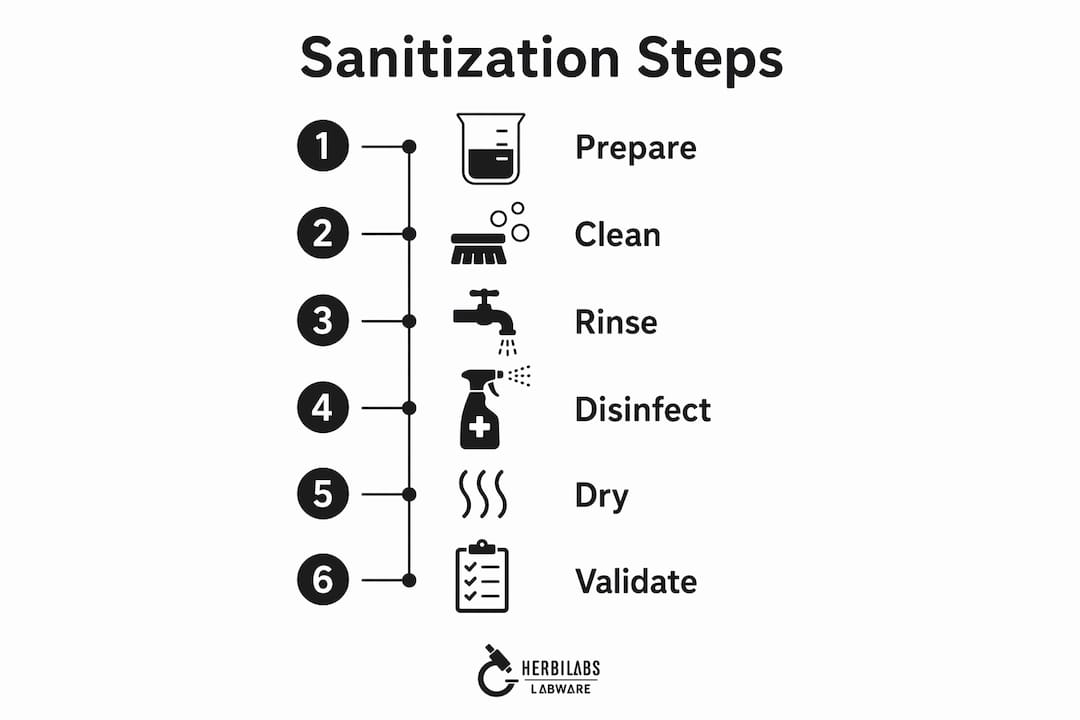
How to implement step-by-step cleaning procedures by material type
The sequence of cleaning steps matters as much as the products you use. Sterilization effectiveness is compromised without effective prior cleaning, which means skipping or rushing early steps undermines every step that follows.
-
Remove visible residues immediately after use. Dried biological material and chemical precipitates are exponentially harder to remove than fresh residues. Rinse glassware with cold water first. Hot water denatures proteins and bonds them to glass surfaces.
-
Apply detergent and scrub according to material sensitivity. For borosilicate glass, use a nylon brush with Alconox solution at 40 to 50°C. For polypropylene plastics, limit water temperature to 40°C maximum to prevent warping. Stainless steel instruments tolerate enzymatic cleaners at higher temperatures. Ceramic items respond well to mild alkaline solutions but crack under thermal shock, so avoid rapid temperature changes.
-
Rinse thoroughly and in sequence. A minimum of three rinses with distilled water removes detergent residues. The final rinse must use sterile deionized water for any labware that will contact biological samples or injectable solutions. Residual detergent is a documented cause of assay interference and cell toxicity.
-
Dry in a controlled environment. Oven drying at 60°C after washing is the validated standard in pharmaceutical QC workflows. This temperature eliminates residual moisture without degrading most materials. Air drying in an open rack is acceptable for general labware but introduces contamination risk in high-biosafety environments. Incomplete drying compromises cleanliness and can reintroduce microbial contamination before sterilization.
-
Inspect before storage or sterilization. Hold cleaned glassware against a light source to check for residue films, cloudiness, or particulate matter. Any item that fails visual inspection goes back to step one.
Material-specific cautions worth knowing: Chromic acid cleaning solution, once a standard for glass, is now classified as a carcinogen and is banned in most regulated labs. Hydrofluoric acid attacks borosilicate glass and must never be used for routine cleaning. Polycarbonate plastics degrade in alkaline detergents above pH 9, causing crazing and micro-fractures that trap contaminants permanently.
Pro Tip: Label your drying racks by contamination category. Mixing labware that held biological samples with glassware that held chemical reagents on the same drying rack creates cross-contamination risk even after cleaning.
What are labware disinfection and sterilization methods and when to apply each?
Cleaning, disinfection, and sterilization are three distinct processes, and cleaning removes residues while sterilization targets microbial kill. Treating them as interchangeable is the most common conceptual error in lab hygiene programs.
Cleaning removes visible and invisible residues but does not guarantee microbial inactivation. Disinfection inactivates most vegetative microorganisms but not necessarily bacterial spores. Sterilization achieves complete microbial kill, including spores, and is required for any labware that contacts sterile media, injectable solutions, or live cell cultures.
The main sterilization methods used in laboratory settings:
- Autoclaving (moist heat, 121°C for 15 to 30 minutes at 15 psi) is the gold standard for heat-stable glass, metal, and polypropylene. Cycle time must account for load density. Overpacking an autoclave prevents steam penetration and produces false-positive sterilization results.
- Dry heat sterilization (160 to 180°C for 1 to 2 hours) suits glassware and metal instruments that cannot tolerate moisture. It is slower than autoclaving but leaves no residual moisture.
- UV-C exposure disinfects exposed surfaces but does not penetrate shadows, liquids, or complex geometries. It is appropriate for biosafety cabinet surfaces between uses, not for labware sterilization.
- Chemical disinfectants including 70% isopropyl alcohol are effective quick-disinfection agents between experiments on compatible surfaces. Chlorine-based agents and peracetic acid provide broader spectrum activity but require thorough rinsing afterward.
After chemical or vapor decontamination, rinsing with sterile deionized water removes residual disinfectant and neutralizes reactive agents. Chlorine residues corrode stainless steel; peracetic acid residues interfere with cell viability assays. The rinse step is not optional.
Sterilization frequency depends on contamination risk and lab type. Microbiological tools in BSL-2 environments require sterilization after every use. General chemistry glassware in a low-risk environment may only require sterilization before first use and after contamination events. Matching sterilization intensity to actual risk prevents unnecessary material degradation and saves time.
How to validate and monitor labware cleaning processes for compliance
Validation transforms a cleaning procedure from a habit into a documented, reproducible system. Regulatory failures often stem from poor process control documentation rather than chemistry failures, which means your records are as important as your technique.
Sampling strategy determines what you can actually detect. Swab sampling suits flat and irregular surfaces, while rinse sampling better captures residues inside internal geometries like tubes and pipettes. Combining both methods prevents blind spots and yields comprehensive residue assessment across complex labware shapes.
Analytical methods for residue detection include:
- Gravimetric analysis: measures total residue mass after evaporation; simple but non-specific
- Total organic carbon (TOC) analysis: detects organic residues at parts-per-billion sensitivity; the standard in pharmaceutical cleaning validation
- Targeted residue assays: HPLC or spectrophotometric methods for specific compounds when cross-contamination with a known substance is the concern
| Analytical method | Sensitivity | Best application |
|---|---|---|
| Gravimetric | Low (mg range) | Gross residue screening |
| Total organic carbon | High (ppb range) | Pharmaceutical QC validation |
| HPLC targeted assay | Very high | Known contaminant verification |
| Visual inspection | Variable | Routine pre-sterilization check |
Process controls including fixture loading, bath life, and routine monitoring are the most common audit failure points in cleaning validation. Document every variable: detergent concentration, water temperature, cycle time, drying duration, and load configuration. An undocumented cleaning step is an unvalidated cleaning step.
Pro Tip: Set acceptance criteria before you run your first validation study, not after. Defining limits post-hoc based on what you achieved is a red flag in any regulatory audit and invalidates the statistical meaning of your results.
What are common mistakes in labware sanitization and how to avoid them?
Most sanitization failures trace back to a small set of repeatable errors. Recognizing them is the first step to eliminating them from your workflow.
- Skipping cleaning before sterilization. Sterilization cannot compensate for visible residues. Organic matter physically shields microorganisms from heat and chemical agents, reducing sterility assurance. Always clean first.
- Using incompatible detergents. Alkaline detergents above pH 9 degrade polycarbonate. Phosphate-containing detergents interfere with biological assays. Match your detergent to your material and your downstream application.
- Incomplete rinsing. Three rinses with distilled water is a minimum, not a target. Residual detergent causes assay interference, cell toxicity, and corrosion of metal instruments.
- Ignoring orientation during cleaning. Unvalidated loading configurations produce inconsistent residue removal. Inverted glassware drains better; nested items trap detergent. Standardize your rack loading and document it.
- Inadequate drying control. Proper drying methods are vital to prevent microbial growth and residue concentration changes. Storing damp labware in closed cabinets creates ideal conditions for mold and bacterial growth.
Pro Tip: Build a sanitization checklist for labs into your standard operating procedure and review it quarterly. Cleaning protocols drift over time as staff turn over and shortcuts accumulate. A quarterly SOP review catches drift before it becomes a compliance problem.
Key takeaways
Effective labware sanitization requires cleaning before sterilization, material-matched detergents, validated drying, and documented process controls to produce reproducible, audit-ready results.
| Point | Details |
|---|---|
| Clean before you sterilize | Residues block sterilization agents; cleaning is a prerequisite, not an optional step. |
| Match detergent to material | Neutral pH, phosphate-free formulas protect glass and plastic without interfering with assays. |
| Validate your drying step | Oven drying at 60°C is the documented standard; inconsistent drying reintroduces contamination. |
| Combine sampling methods | Use swab sampling for surfaces and rinse sampling for internal geometries to cover all residue types. |
| Document every variable | Fixture loading, bath life, and cycle time are the most common audit failure points in cleaning validation. |
Why documentation beats chemistry in most sanitization failures
After years of working with research labs and quality teams, the pattern I see most often is this: the chemistry is fine, and the documentation is not. Labs invest in quality detergents, autoclaves, and deionized water systems, then lose compliance audits because nobody recorded the detergent concentration, the bath age, or the drying time. Process validation requires capability analysis and routine monitoring, not just a one-time demonstration that the process can work.
The other thing I consistently see underestimated is the drying step. Most technicians treat drying as passive waiting. It is not. It is an active, controllable variable that determines whether your cleaned labware stays clean or picks up environmental contamination before sterilization. Controlling drying is as important as controlling your detergent concentration.
My practical recommendation: build your sanitization program around the documentation first, then optimize the chemistry. A well-documented average process outperforms an undocumented excellent one every time an auditor walks through the door. For labs working with injectable-grade solutions or peptide research, the stakes are even higher. The bacteriostatic vs sterile water distinction matters at the rinsing stage, and getting it wrong contaminates your final product regardless of how well you cleaned everything else.
— Ragnar
Trusted labware products and sterile solutions from Herbilabs
Herbilabs supplies research-grade bacteriostatic water, sterile diluents, and reconstitution solutions manufactured to strict purity standards for labs across the UK and Europe. When your sanitization protocol calls for sterile deionized water in the final rinse or a validated reconstitution solution for downstream applications, the quality of that water determines the integrity of your results.
Herbilabs products are manufactured in a dedicated facility with rigorous quality control, making them suitable for demanding research environments and peptide science applications. If you are building or reviewing your lab’s cleaning and sterilization workflow, the bacteriostatic water guide covers water selection in depth. For specific product questions and wholesale pricing, visit Herbilabs directly.
FAQ
What is the difference between cleaning, disinfection, and sterilization?
Cleaning removes visible residues and reduces microbial load. Disinfection inactivates most vegetative microorganisms. Sterilization achieves complete microbial kill, including spores, and is required for labware contacting sterile or injectable materials.
How often should labware be sterilized?
Sterilization frequency depends on contamination risk and lab type. Microbiological tools in BSL-2 environments require sterilization after every use, while general chemistry glassware may only need sterilization before first use or after a contamination event.
What rinse water should I use after cleaning labware?
Use sterile deionized water for the final rinse on any labware that will contact biological samples, sterile media, or injectable solutions. Distilled water is acceptable for general chemistry glassware where ionic contamination is the primary concern.
Why does cleaning need to happen before sterilization?
Organic residues physically shield microorganisms from heat and chemical sterilants, reducing sterility assurance. Sterilization methods including autoclaving and vaporized hydrogen peroxide are less effective without prior cleaning.
What are the most common audit failures in cleaning validation?
Fixture loading, bath life, and routine monitoring are the most frequently cited audit failure points. Regulatory inspectors look for documented process controls, not just evidence that cleaning chemistry is correct.