Private Label, White Label, Wholesale partnerships available - EU, USA and UK - Free shipping from €75
Sterility in Labs: What It Means and Why It Matters
Learn what does sterile mean in laboratory settings, why it matters, and how understanding sterility can enhance safety and data integrity.
TL;DR:
- Sterility in peptide research means complete absence of viable microorganisms, not just cleanliness. Achieving and maintaining true sterility requires validated processes like aseptic filling and proper filtration, not just surface cleaning. Relying solely on sterility tests is insufficient, as they sample limited batch portions and cannot guarantee all units are uncontaminated.
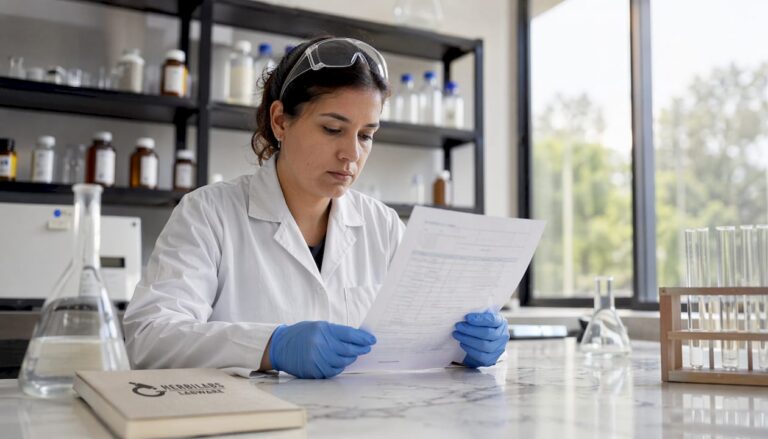
Most researchers working with peptides have cleaned their bench, wiped down their equipment, and felt confident they were working in a safe environment. That feeling of confidence is understandable, but it can be misleading. Clean and sterile are not the same thing, and confusing the two is one of the most consequential errors in independent research settings. Understanding exactly what sterility means, how it is achieved, and why no single test can guarantee it is not just academic knowledge. For peptide users and independent researchers across Europe, this knowledge directly shapes safety, data integrity, and the reliability of every preparation.
Table of Contents
- Understanding sterility: Beyond clean surfaces
- How sterility is achieved and maintained
- Testing for sterility: Methods and limitations
- Practical implications for peptide users and independent research
- The uncomfortable truth about laboratory sterility
- Reliable resources for sterile lab solutions
- Frequently asked questions
Key Takeaways
| Point | Details |
|---|---|
| Sterile versus clean | Sterile means no viable microbes; ‘clean’ only reduces visible dirt or contamination. |
| Process controls are vital | Validated aseptic methods and sterilization achieve true sterility far beyond simple cleaning. |
| Testing has limitations | Lab sterility tests find contamination but don’t guarantee safety unless combined with process validation. |
| Critical for peptide research | Sterility safeguards both user safety and scientific validity in all lab and peptide workflows. |
Understanding sterility: Beyond clean surfaces
The word “sterile” gets used loosely in everyday language, but in laboratory and life-science contexts its meaning is precise and unforgiving. Sterile means free from viable (living) microorganisms, which includes bacteria, yeast, mold, fungi, and spores. Not reduced. Not minimal. Absent. That absolute standard is what separates sterility from every other level of cleanliness, and it matters enormously when you are working with any solution intended for biological use.
Cleanliness, by contrast, reduces visible contamination and lowers the overall bioburden (the number of microorganisms present on a surface or in a solution). A clean bench looks good and has fewer microbes than an untreated surface, but it may still harbor viable organisms at levels that can cause infection, degrade a peptide, or invalidate a culture-based experiment. Critically, clean conditions and sterile conditions are not the same thing, and “clean enough” is never an acceptable substitute when working with sterile preparations.
Clean vs. sterile in lab consumables: a direct comparison
- Clean vials: Washed, visually clear, but may contain residual microbial contamination
- Sterile vials: Processed by validated methods to eliminate all viable organisms, confirmed by quality controls
- Clean diluent (e.g., tap water): Treated for drinking quality, not pharmaceutical sterility
- Sterile diluent: Manufactured under aseptic or terminally sterilized conditions with tested absence of viable organisms
- Clean bench surface: Wiped with ethanol, reduced bioburden, not sterile
- Laminar flow hood with HEPA filtration: Approaches sterile working conditions when used correctly with appropriate technique
“Sterile” means the complete absence of viable microorganisms. Any solution, tool, or surface described as sterile must have gone through a validated process that eliminates all living microbial life, not just reduced it.
Understanding sterility in lab products is particularly critical for those working with injectable formulations, because the barrier between a contaminated solution and systemic exposure is essentially zero. That reality elevates the standard from best practice to an absolute requirement.
How sterility is achieved and maintained
Knowing what sterility means is one thing. Understanding how it is actually created and preserved across a manufacturing or lab workflow is another. The two primary frameworks are aseptic processing and terminal sterilization, and both have specific applications depending on the product and process.
Aseptic processing involves assembling or filling sterile products in a controlled environment where every component (container, closure, solution) is individually sterilized before it comes into contact with anything else. The goal is to prevent contamination from entering in the first place. Terminal sterilization, by contrast, applies a sterilizing treatment (such as heat or radiation) to the final product in its sealed container, eliminating any contamination that may have entered during filling.
According to FDA cGMP guidance on aseptic processing, sterility is maintained through validated production controls, not assumed after a cleanroom treatment. This is a fundamental shift in how you should think about sterility. It is not a property you apply at the end of a process. It is something you build in from the very beginning through tightly controlled steps.
Sterilization methods compared
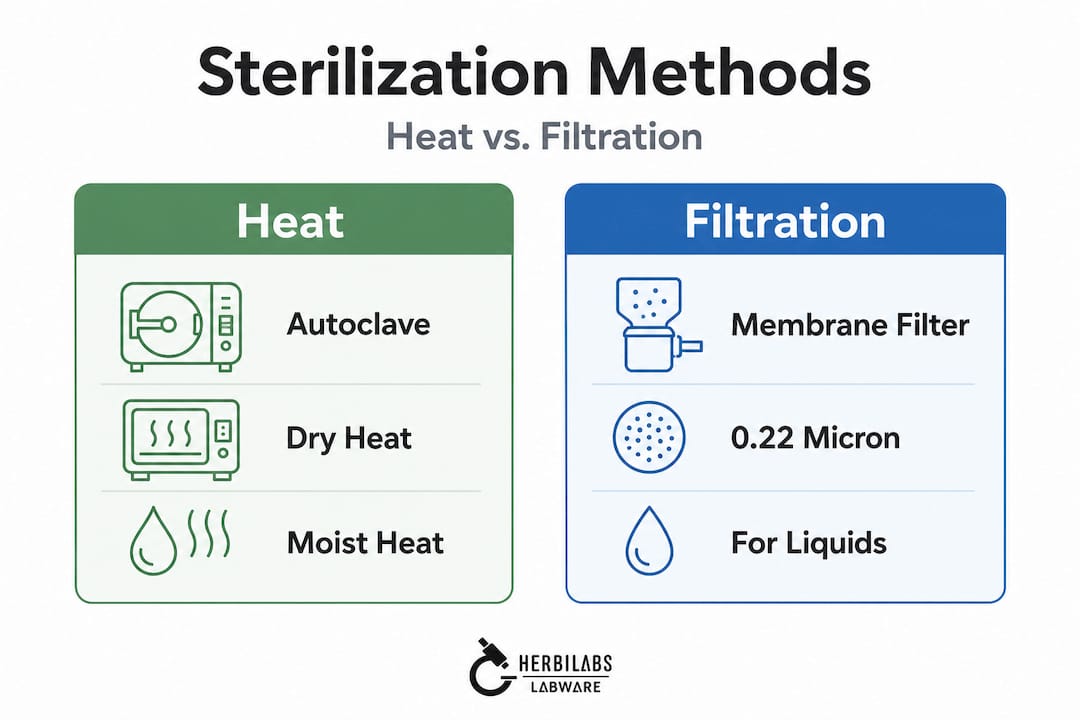
| Method | Mechanism | Common applications | Key limitation |
|---|---|---|---|
| Autoclave (moist heat) | Steam at 121°C, 15+ min | Glassware, media, instruments | Not suitable for heat-sensitive compounds |
| Filtration (0.22 µm) | Physical removal of microbes | Solutions, peptide diluents | Does not remove viruses or endotoxins |
| Dry heat | High temperature (160-180°C) | Glassware, metal tools | Slow, not for plastics or solutions |
| Gamma irradiation | Ionizing radiation | Disposable plastics, single-use items | Can alter material properties |
| Chemical (EtO gas) | Alkylation of microbial DNA | Plastic devices, packaging | Residue concerns, long cycle times |
For peptide reconstitution, filtration through a validated 0.22 µm membrane is the most relevant method, as most peptides cannot withstand autoclaving. Using sterile lab techniques appropriate to your specific workflow is not optional. It is the foundation of reliable results.
Steps for maintaining sterility throughout production
- Start with sterile-certified consumables (vials, syringes, filter units, diluents)
- Prepare your work area using a laminar flow cabinet or biosafety cabinet if available
- Disinfect all surfaces with 70% isopropyl alcohol and allow contact time before beginning
- Minimize exposure time of open containers to the environment
- Never touch or breathe directly over any open sterile container or solution
- Filter all solutions through a 0.22 µm membrane before use in any sterile context
- Seal vials immediately after filling and inspect for visible particulate matter
Pro Tip: When reconstituting peptides, pre-chill your sterile diluent and work in the quietest, least-trafficked area you have. Air movement near open vials is one of the most overlooked sources of contamination in independent lab settings. Also check out these lab sterilization tips for common mistakes to avoid.
Testing for sterility: Methods and limitations
Testing whether a product is sterile is not as straightforward as it sounds. The most widely recognized method is culture-based sterility testing, regulated under standards like USP <71>, which uses defined culture media and incubation conditions to detect microbial growth in a sample. If growth is observed, the batch fails. If no growth is observed, the batch passes.
The challenge is what a passing result actually tells you. Sterility testing uses culture-based methods to confirm the absence of viable microorganisms, and it is treated as an absolute quality requirement for pharmaceutical safety. But testing only samples a portion of any given batch. You cannot test every vial in a lot without destroying the product, so results are inherently probabilistic. A passing result means no contamination was detected in the sample set, not that every unit is definitively sterile.
Sterility test protocol comparison
| Test type | Standard | Detection basis | Incubation period |
|---|---|---|---|
| Direct inoculation | USP <71> | Culture growth in fluid thioglycollate or soybean casein | 14 days |
| Membrane filtration | USP <71> | Concentrated microbial cells captured on 0.45 µm membrane | 14 days |
| Rapid microbiological methods | ISO 13408-6 | ATP bioluminescence, flow cytometry, PCR | Hours to days |
| Environmental monitoring | ISO 14644 | Settle plates, contact plates, air sampling | Ongoing |
Understanding sterility testing terminology helps you interpret COA (Certificate of Analysis) documents and quality reports that come with your lab reagents. Many researchers accept a “sterility: pass” notation without understanding what it means or what it cannot tell them.
Limitations of sterility testing are well documented. Testing is pass/fail for the sampled units, not a confirmation that every unit in the batch is free from contamination. This is why the concept of sterility assurance level (SAL) exists. SAL expresses the probability that a product remains non-sterile after a validated sterilization process, typically expressed as a 10^-6 probability (one in a million chance of a viable organism remaining).
Testing limitations to keep in mind
- Standard methods require 14 days for full incubation, making real-time batch release decisions difficult
- False negatives can occur when organisms are present but grow slowly or require specific media
- Sample size tested represents a fraction of any production batch
- Testing conditions in contract labs may vary in sensitivity and methodology
- A negative result confirms no growth in tested samples, not absence of contamination across the entire lot
Sterility testing is an important control, but it cannot stand alone. Without validated manufacturing processes, environmental monitoring, and documented contamination controls, a passing test result provides limited assurance.
This is why the benefits of contaminant-free products manufactured under strict process controls go far beyond any single test result. Process validation and quality assurance for lab water are what give you genuine confidence in what you are using.
Practical implications for peptide users and independent research
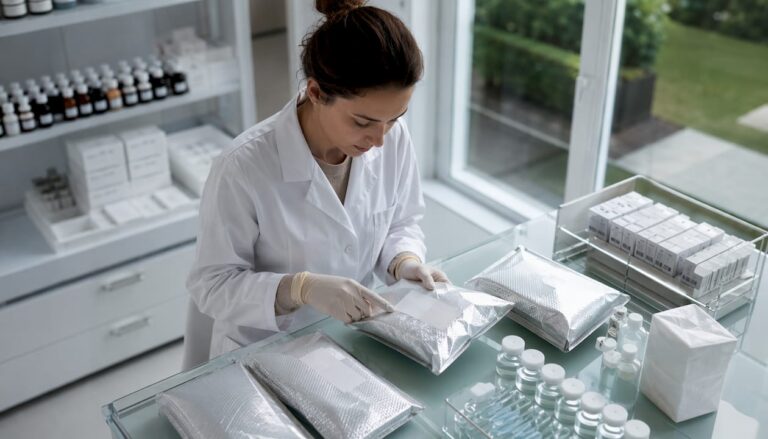
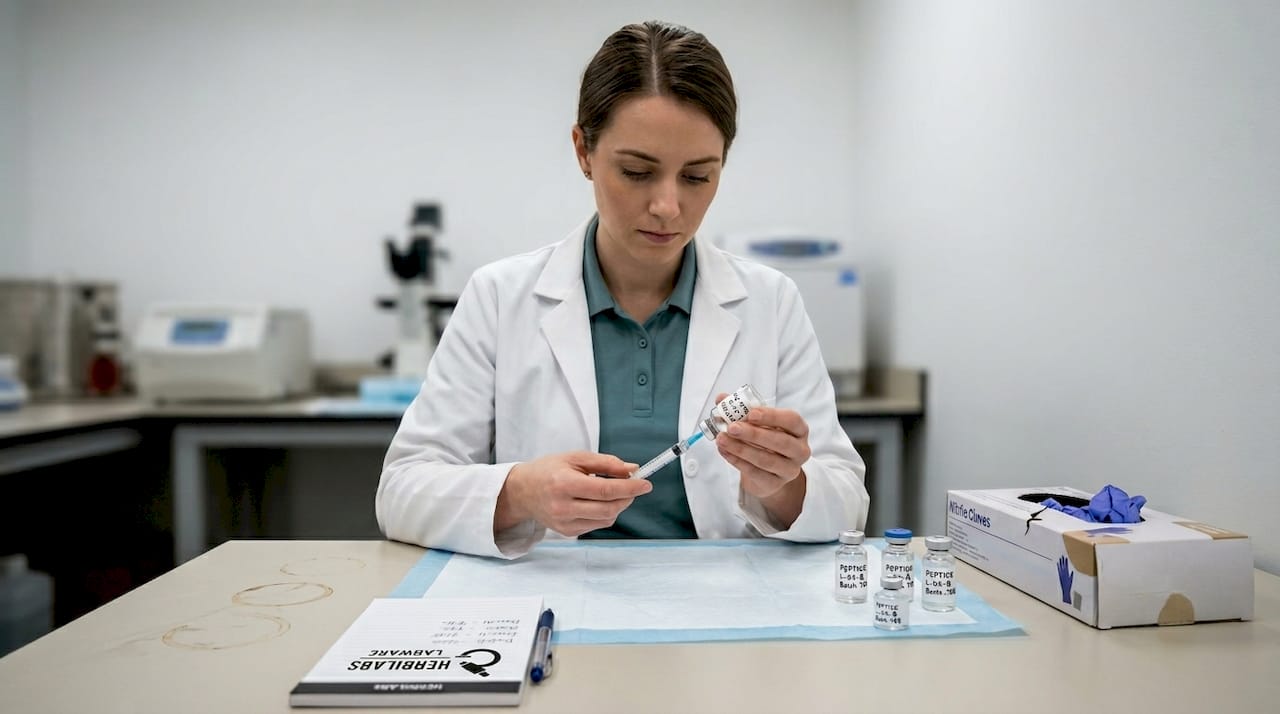
All of this translates into something very concrete for independent researchers and peptide users. When you reconstitute a peptide using aseptic technique, you must treat every element of that process as a potential contamination point. The diluent, the syringe, the needle, the vial septum, the work surface, and even your gloved hands can all introduce viable microorganisms into an otherwise sterile preparation.
Using non-sterile consumables or substituting tap water or saline of unknown provenance for a verified sterile diluent compounds risk at every step. The risks are not linear. Each uncontrolled variable multiplies the probability that viable organisms reach the final preparation. This is why choosing a bacteriostatic vs sterile water option appropriate to your use case matters so much from a safety standpoint.
Steps for maintaining sterility in peptide reconstitution
- Confirm your diluent is manufactured-grade sterile with a valid COA from a reliable supplier
- Use only sterile, single-use syringes and needles for every step of reconstitution
- Wipe vial septa with fresh 70% isopropyl alcohol swabs and allow 30 seconds of contact time before piercing
- Filter your reconstituted solution through a 0.22 µm sterile syringe filter if transferring to a multi-use vial
- Work in the cleanest, most controlled environment available and minimize air movement
- Label reconstituted vials with date and store appropriately to slow any potential microbial growth
- Inspect the solution before every use for particulates, cloudiness, or color change
Pro Tip: Always treat anything destined for sterile body compartments with full aseptic precautions, even if the compound itself appears stable and the vial looks clean. Visual appearance tells you nothing about microbial contamination. Following a complete contamination control protocol and keeping a lab safety checklist on hand are two practical steps that meaningfully reduce risk in independent settings.
The stakes in independent research are higher than many users acknowledge. Without the environmental monitoring, full-batch testing, and validated equipment of a licensed pharmaceutical facility, your process controls and the quality of your source materials are your primary safeguards.
The uncomfortable truth about laboratory sterility
Here is something that rarely gets stated plainly in product guides or protocol sheets: true sterility is a goal, not a guaranteed outcome. Every experienced researcher or manufacturing professional understands this at a process level. But the language around sterility, particularly in commercial contexts, often implies a certainty that the science does not support.
We have seen independent researchers assume that purchasing a product labeled “sterile” means they can handle it loosely without affecting safety. That assumption is wrong in two directions. The product may meet sterility specifications at the point of manufacture, but once you open it, introduce a needle, expose it to ambient air, or contaminate the septum with inadequate preparation, the sterility of what you started with is no longer relevant. What matters is what you end up with in the final preparation.
From our experience working with the peptide research community across Europe, the most consistent source of preventable contamination is not poor product quality. It is process shortcuts that seem minor in the moment. Skipping the alcohol swab on a septum. Reusing a syringe for convenience. Working with an open vial near an air vent or next to a talking colleague.
Most real-world failures trace back to overlooking process-level risks, not to flawed manufacturing. Managing contamination risk with practical controls is far more achievable than chasing a theoretically perfect sterile environment. You cannot create a pharmaceutical-grade cleanroom at home or in a private lab, but you can apply lab quality control insights that dramatically reduce risk when applied consistently.
Do not shortcut process validation simply because recent tests were negative. A negative test result on a batch tells you about that sample set. Your behavior during reconstitution determines what is actually in your syringe.
Reliable resources for sterile lab solutions
Sterility in your research workflow starts before you open a vial. It starts with what you source and where it comes from.

At Herbilabs, we supply bacteriostatic water and sterile reconstitution solutions manufactured to pharmaceutical-grade standards with full documentation, designed specifically for the peptide research community. If you want to understand which water type is right for your application, our bacteriostatic water FAQs cover the most common questions in depth. For a direct comparison of your diluent options and how each applies to different research contexts, the bacteriostatic vs sterile water guide is the clearest starting point. When you are ready to source a verified, research-grade diluent, our sterile reconstitution solution is manufactured to support reliable, contaminant-free preparation every time.
Frequently asked questions
What is the strict definition of sterile in lab settings?
Sterile means completely free from all viable microorganisms, including bacteria, yeast, and fungi, verified through validated manufacturing processes and sterility testing protocols.
How is sterility tested in the laboratory?
USP <71> uses culture-based methods that detect microbial growth in defined media after 14 days of incubation, with a pass or fail result based on whether any growth is observed in the tested sample set.
Can something be clean but not sterile?
Yes. Clean conditions reduce bioburden but do not eliminate all viable microorganisms, meaning a visually clean surface or solution can still harbor bacteria or fungi at levels that pose contamination risk.
Why is sterility so important for peptide research?
Sterility is an absolute requirement for products entering sterile body compartments because any viable microbial contamination can compromise safety, degrade the active compound, or produce unpredictable biological effects.
Is negative sterility testing proof that a product is safe?
No. Sterility testing alone cannot prove absolute safety because results apply only to the tested sample units. Validated manufacturing controls, environmental monitoring, and contamination management together provide genuine sterility assurance.